
Desserts
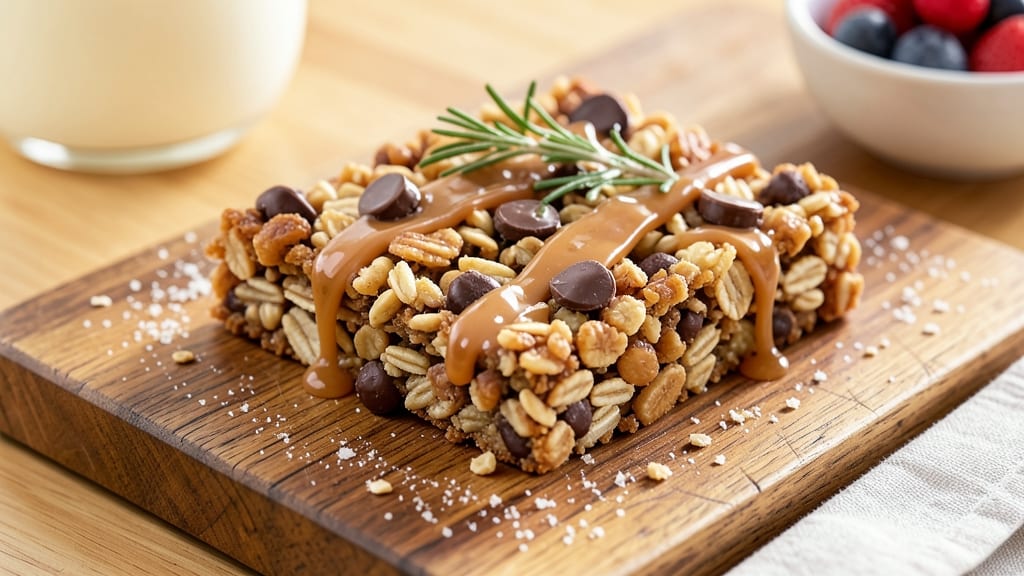
This chocolate chip granola bar recipe without Rice Krispies delivers the perfect balance of crunchy clusters and chewy centers—no cereal needed. I developed it after years of testing homemade granola bars that either crumbled apart or turned too dense.
The secret lies in a simple binding method that creates that signature texture without relying on marshmallows or Rice Krispies.
What makes this recipe stand out is its versatility—you can bake it for extra crispiness or keep it no-bake for a quicker option.
The base combines rolled oats, peanut butter, honey, and chocolate chips, but the real magic happens when you press the mixture into a pan and cut it into bars. This method ensures every bite has that satisfying mix of textures: crispy edges, chewy centers, and pockets of melty chocolate.
The result is a batch of granola bars that's sturdy enough to pack for school lunches or road trips but still tastes like a homemade treat. You'll love how customizable they are—add nuts, seeds, or even protein powder to tailor them to your preferences.
These bars keep well for up to a week, making them perfect for meal prep.
Whether you're looking for a healthier snack option or a nostalgic treat without the cereal, this recipe delivers. The process is straightforward, and the ingredients are simple, but the result is anything but basic. Let's get started on making these bars that'll become a family favorite.
Ingredients for chocolate chip granola bar recipe without rice krispies
Simple pantry staples transform into bars with perfect crunchy-chewy texture—no cereal required.
| Ingredient | Amount | Notes |
|---|---|---|
| Rolled Oats 🌾 | 3 cups | Old-fashioned, not quick oats |
| Peanut Butter 🥜 | 1 cup | Creamy, unsalted preferred |
| Honey 🍯 | ½ cup | Light or wildflower variety |
| Vanilla Extract 🌸 | 1 tsp | Pure vanilla for best flavor |
| Salt 🧂 | ½ tsp | Fine sea salt preferred |
| Semisweet Chocolate Chips 🍫 | 1 ½ cups | Enjoy Life brand for allergies |
| Almonds 🌰 | 1 cup | Chopped, toasted if possible |
| Sunflower Seeds 🌻 | ½ cup | Raw or dry-roasted |
| Coconut Oil 🥥 | ¼ cup | Melted, for binding |
| Dark Chocolate Chips 🍫 | ½ cup | Optional, for extra richness |
| Cocoa Powder 🍫 | 2 tbsp | Natural, unsweetened |
| Flaky Sea Salt 🧂 | 1 tbsp | For topping, optional |
The oats are the backbone here. Bob's Red Mill or Quaker Old Fashioned work best—they hold their shape when baked. Peanut butter matters too: natural peanut butter adds texture, but creamy is fine if you prefer smoothness. Honey should be fresh and liquid—Trader Joe's has great options. For chocolate chips, Enjoy Life is my go-to (allergy-friendly), but any brand works. Pro tip: toast your almonds in a dry pan for 3-4 minutes before chopping—they add serious flavor. If you're short on time, skip the toasting, but don't skip the chopping (a food processor makes this easy).
No peanut butter? Almond butter or sunflower seed butter works in a pinch. Honey too thick? Warm it gently in a bowl over hot water until pourable. Out of chocolate chips? Chop a chocolate bar (70% dark or milk) into small pieces. Want extra crunch? Add granola or crushed pretzels to the mix. For a protein boost, stir in vanilla protein powder (about 2 tbsp) or mix in oat flour if you want to reduce oats. The coconut oil is key for binding—don't substitute butter (it'll make them greasy).
These bars keep for 1 week in an airtight container at room temperature, or 3 months in the freezer. I like to portion them into individual bags for lunches—just pop one in your bag the night before. For extra crispiness, bake them 2-3 minutes longer. If they soften in humidity, pop them back in the oven for 5 minutes at 300°F. The chocolate chips melt faster when warm, so let bars cool slightly before cutting. Store extras in the fridge for 2 weeks if you're in a hot climate.
Why You'll Love This Recipe
- No-Fuss Mixing: I swear by this recipe because it’s just stir, press, slice—no fancy equipment. The oats and peanut butter bind like magic, so I’m not stressing over melted chocolate or sticky messes.
- Rich & Crunchy: That first bite? Warm peanut butter, crispy oats, and honey-sweetened chocolate chips—it’s like a hug in bar form. Honestly, the vanilla and salt make it taste way more gourmet than it should.
- Lunchbox Legend: Between us, these are my go-to for school lunches, road trips, or when I’m too tired to cook. They hold up for days, and my kids actually eat them—no complaints about soggy snacks here.
- Budget Win: A single batch costs me pennies but feels like a treat. Peanut butter and honey stretch far, and I can double the recipe without breaking the bank. Leftovers? They vanish faster than I can say “second helping.”
Step-by-step instructions for chocolate chip granola bars
Here's how to create bars with perfect crunchy clusters and chewy centers—no rice krispies needed.
Melt the Binding Ingredients Together
In a medium saucepan over low heat, combine the 1 cup peanut butter, 0.5 cup honey, 0.25 cup melted coconut oil, and 2 tablespoons cocoa powder. Stir constantly with a wooden spoon until everything melts smoothly and reaches a 160°F temperature—this ensures the mixture is fully liquid but not scorched.
I like to watch for the peanut butter to lose its graininess and become completely smooth. If it starts to bubble or smell burnt, immediately reduce the heat. Once melted, remove from heat and stir in the 1 teaspoon vanilla extract and 0.5 teaspoon salt. Let the mixture cool slightly for 5 minutes—it should be warm but not hot to the touch before moving to the next step.
Toast the Oats and Mix in Dry Ingredients
In a large mixing bowl, combine the 3 cups rolled oats, 1 cup chopped almonds, and 0.5 cup sunflower seeds. Spread them on a baking sheet and toast in a 350°F oven for 8-10 minutes, stirring halfway, until they're fragrant and lightly golden. This step deepens their flavor and adds that perfect crunch.
While the oat mixture is still warm, pour the cooled peanut butter mixture over it. Add the 1.5 cups semisweet chocolate chips and 0.5 cup dark chocolate chips (if using) and stir everything together with a spatula until fully coated. The mixture should hold together when pressed—if it's too crumbly, add 1-2 teaspoons of honey to bind it.
Press and Set the Granola Bars
Line an 8x8-inch baking dish with parchment paper, leaving an overhang on the sides for easy removal. Press the granola mixture firmly and evenly into the pan using a spatula or the back of a spoon. I like to use a glass measuring cup to press down in sections—this ensures even distribution and prevents air pockets.
Smooth the top with the spatula and sprinkle with 1 tablespoon flaky sea salt for a burst of flavor. Cover the dish with plastic wrap and refrigerate for at least 2 hours (or up to 24 hours) until firm. The longer it chills, the more compact and chewy the bars will become.
Cut and Enjoy Your Homemade Bars
Once fully set, remove the granola bars from the fridge and use the parchment overhang to lift them out of the pan. Cut into 12 equal bars using a sharp knife—dip the knife in hot water between cuts for clean slices. Store in an airtight container at room temperature for up to 5 days or freeze for longer storage.
Each bar should have a satisfying crunch from the toasted oats and nuts, a chewy center from the peanut butter mixture, and pockets of melted chocolate. The flaky sea salt adds a perfect finishing touch—just like a bakery version, but made with love (and no artificial ingredients!).
Pro Tips For Making Chocolate Chip Granola Bar Recipe Without Rice Krispies
- STIR CONSTANTLY AT FIRST: The peanut butter and honey mix will clump like glue if you don’t keep moving it—especially when you first add the wet ingredients to the oats. I used to walk away for "just a second," and by the time I came back, I had a sticky mess to scrape off the bowl. Keep that spoon going until everything’s uniformly coated, then you can ease up.
- USE WARM PEANUT BUTTER: Cold peanut butter from the fridge will make your bars dense and chewy. Microwave it for 10-15 seconds first—just enough to soften it so it blends smoothly with the honey. Sounds weird, but it works: your bars will hold together better and taste richer without extra effort.
- PRESS THEM THICK: Thin granola bars snap like chalk. Press the mixture into the pan about ½-inch thick (use a wet spatula to smooth it out), then cut while still slightly sticky. They’ll firm up as they cool, but if you press too lightly, you’ll end up with crumbly, unsatisfying rectangles.
- SALT THE OATS FIRST: Sprinkle the salt directly onto the dry oats before adding any wet ingredients—it’ll distribute evenly and cut through the sweetness better. I learned this the hard way by mixing it in later, and the flavor was uneven. A pinch (¼ teaspoon) is enough; don’t overdo it or you’ll regret it.
Pro cooking tips for this dish
Peanut Butter Magic
The peanut butter isn't just a binder—it's the secret to that perfect chewy texture. I always use creamy unsalted peanut butter (like Smucker's Natural or Jif Creamy) because it melts smoothly with the honey and coconut oil.
If you're using natural peanut butter, stir it well first to break up any oil separation. The key is to melt it gently over low heat—if it gets too hot, it'll scorch and turn bitter.
Once melted, let it cool slightly before mixing with the oats—this prevents the chocolate chips from melting prematurely. 🥜
Toast Oats for Depth
Skipping the toasting step means missing out on serious flavor. Spread your rolled oats on a baking sheet and toast them at 350°F for 8-10 minutes, stirring halfway. You want them to smell nutty and turn a golden brown—this caramelization adds complexity.
I like to toast the almonds and sunflower seeds right alongside them. Pro tip: If you're short on time, you can toast them in a dry skillet over medium heat for 3-4 minutes, shaking the pan constantly. Just don’t walk away—they burn fast! 🌾
Press Like a Pro
Even distribution is everything. After mixing everything together, press the granola firmly into your 8x8-inch pan using the back of a spoon or a glass measuring cup. I find this works better than a spatula because it gives me more control.
Press in sections, starting from one corner and working your way to the opposite side. This ensures no weak spots where the bars might crumble. Once pressed, smooth the top with a spatula and sprinkle with flaky sea salt—this adds a salty contrast that makes the sweetness pop. 🧂
Chill for Structure
Patience here is key. Cover your pan with plastic wrap and refrigerate for at least 2 hours—this lets the coconut oil and peanut butter set properly. The longer you chill them (up to 24 hours), the firmer and chewier they’ll become.
I like to make them the night before so they’re ready to grab and go in the morning. If you’re in a hurry, pop them in the freezer for 30 minutes to speed up the process. Just don’t skip the chilling step—it’s what keeps them from falling apart! ❄️
Cut Cleanly
Use a sharp knife and dip it in hot water between cuts—this prevents the bars from sticking and gives you clean edges. Cut into 12 equal bars by first slicing into thirds lengthwise, then into quarters widthwise.
If the bars feel too soft when you cut them, let them sit at room temperature for 10 minutes to firm up. For extra crispiness, you can even bake them at 300°F for 2-3 minutes after cutting. 🔪
Storage Secrets
Store your granola bars in an airtight container at room temperature for up to 5 days, or freeze them for 3 months. I like to portion them into individual bags for lunches—just grab one and go.
If you live in a humid climate, store them in the fridge to prevent softening. To reheat, microwave a bar for 10-15 seconds to restore crispiness. The chocolate chips will melt faster if the bars are warm, so let them cool slightly before cutting. 💫
Nutrition facts
Frequently asked questions
Why do these granola bars need to chill before cutting?
The chilling step is crucial because the coconut oil and peanut butter mixture needs time to set properly. Without it, your bars will crumble apart when you try to cut them. The longer they chill (up to 24 hours), the more compact and chewy they become—this is what gives them that bakery-style texture. Think of it like setting a cake batter before baking!
Can I make these bars without peanut butter?
Swap the peanut butter for almond butter, sunflower seed butter, or even melted butter mixed with extra honey. Just remember that different fats will affect the texture slightly—seed butters add a nuttier flavor while butter makes them softer. For a vegan option, use coconut oil as the primary binder instead.
How do I prevent the chocolate chips from melting too much?
Work quickly after mixing in the chocolate chips and keep the peanut butter mixture cool (around 100°F) before combining. If your kitchen is warm, chill the mixture for 10 minutes before pressing into the pan. For extra insurance, use white chocolate chips instead—they melt at a lower temperature than semisweet.
What if my bars are too crumbly after pressing?
This usually happens if the mixture wasn't pressed firmly enough or if the binding ingredients weren't fully combined. Try adding 1-2 teaspoons of honey or melted coconut oil to the mix, then press again with more pressure. For extra hold, sprinkle a little extra cocoa powder between layers if making multiple batches.
Can I add protein powder to these bars?
Yes! Stir in 2-3 tablespoons of vanilla or unflavored protein powder along with the dry ingredients. This will make them more substantial and great for post-workout snacks. Just be aware that too much can make them denser—start with a small amount and adjust to taste.