
Sauces & Condiments
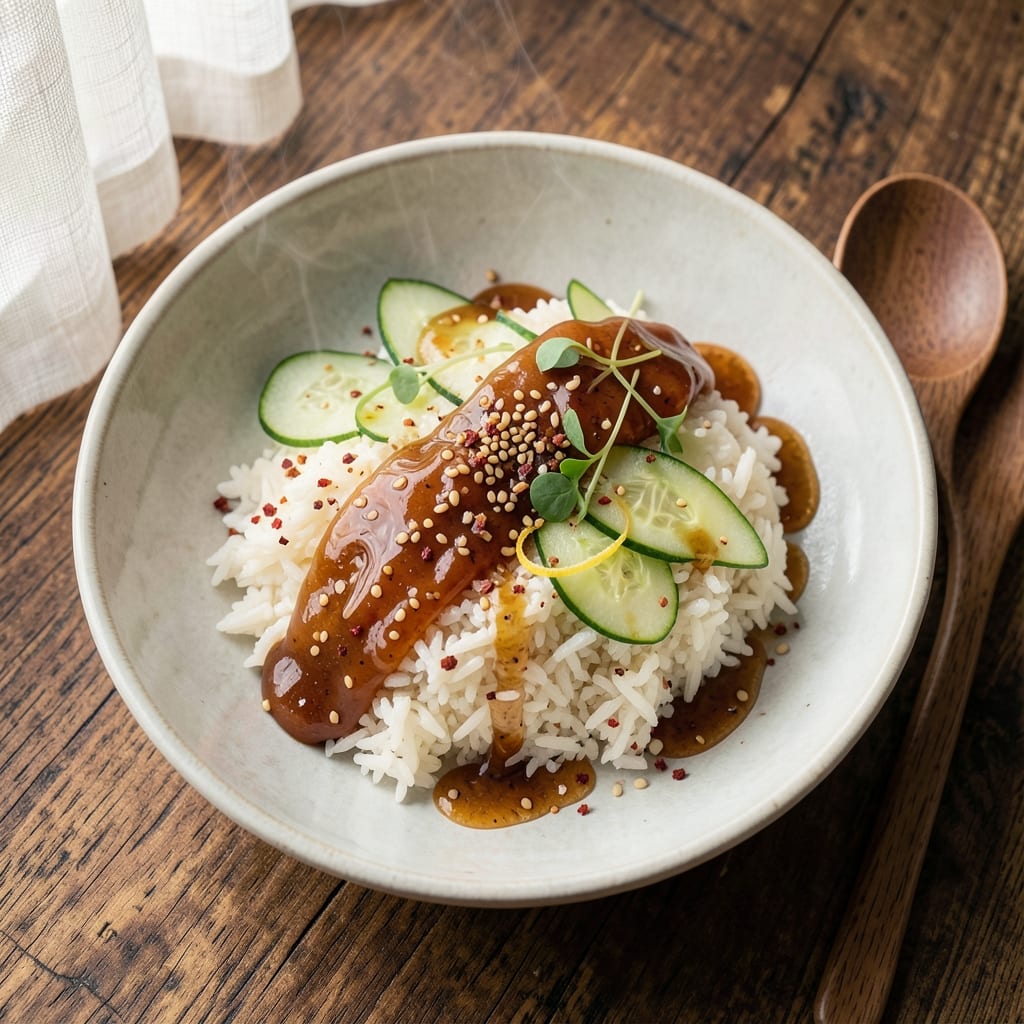
This Asian rice bowl sauce recipe transforms any simple meal into a restaurant-worthy dish with just five ingredients and 10 minutes of prep. The secret lies in balancing umami-rich soy sauce with bright ginger, aromatic garlic, and a touch of sweetness—creating a sauce that clings perfectly to rice, proteins, and vegetables while adding depth without overpowering flavors. Professional chefs rely on this technique to elevate everyday bowls into something extraordinary.
The magic happens when you simmer the sauce just until the aromatics dissolve, then let it cool slightly before using. This method ensures the flavors meld seamlessly, delivering a versatile sauce that works with everything from grilled chicken and tofu to fresh slaw and steamed veggies. Store it in the fridge for up to a week, or freeze portions for quick weeknight meals—because great flavor shouldn’t require last-minute effort.
Ingredients for asian rice bowl sauce
Five ingredients create this umami-rich sauce—professional chefs' secret for restaurant-quality rice bowls.
| Ingredient | Amount | Notes |
|---|---|---|
| Light Soy Sauce 🥢 | ½ cup | High-quality, low-sodium preferred |
| Sesame Oil 🫒 | 1 tbsp | Toasted, for authentic aroma |
| Fresh Ginger 🧅 | 2 tbsp | Finely grated, vibrant color |
| Garlic Cloves 🧄 | 3 cloves | Minced, aromatic intensity |
| Honey 🍯 | 1 tbsp | Raw, for natural sweetness |
The soy sauce is the foundation—Kikkoman or La Choy deliver consistent quality, but any light soy will work. Fresh ginger and garlic are non-negotiable for authentic flavor; look for plump, firm ginger roots with tight skin and garlic cloves that feel heavy for their size. Sesame oil should be toasted (not flavored)—Lee Kum Kee is a reliable brand. The honey adds just enough sweetness to balance the umami without overpowering; raw Manuka honey enhances depth if you're feeling indulgent.
No fresh ginger? Powdered ginger at half the amount works in a pinch, though texture will differ. Substitute garlic powder for minced garlic (one-third the quantity), but fresh is always superior. Running low on sesame oil? Toasted peanut oil mimics the nutty aroma. For a vegetarian version, ensure your soy sauce is plant-based (most are), and replace honey with maple syrup. The sauce's versatility shines—it clings beautifully to rice, tofu, grilled proteins, and even fresh vegetables, making it a pantry essential.
This sauce keeps for up to one week in the fridge, sealed in an airtight container. For longer storage, freeze in ice cube trays—thaw as needed. The flavors deepen over time, so leftovers often taste even better. Double the batch; it disappears faster than you'd expect. When reheating, warm gently on the stove or microwave for 20-30 seconds to preserve the delicate balance of flavors.
Why You'll Love This Recipe
- Pantry Magic: I swear by this sauce because it’s all about what you already have. Light soy, sesame oil, and honey? That’s it for the heavy hitters—no specialty shopping, just pure flavor from your spice rack. (Yes, even the ginger and garlic are easy to find.)
- Umami Bomb: That first hit of garlic and ginger sizzling in the pan? Chef’s kiss. The honey rounds out the sharpness while the sesame oil adds this nutty warmth—it’s the kind of sauce that makes you go back for seconds without even trying.
- Lunchbox Hero: Between us, this is my go-to for meal prep. Toss it with rice, roasted veggies, or even cold chicken, and it stays vibrant for days. Honestly, I’ve had it in my lunch for five days straight, and it’s still packing flavor.
- Budget Flex: I make a double batch every time because it’s so dang cheap to stretch. A little goes a long way—drizzle it on noodles, stir into stir-fries, or even glaze baked tofu. My wallet and my taste buds win.
Step-by-step instructions for crafting the perfect Asian rice bowl sauce
This umami-rich sauce brings depth to any rice bowl in minutes—just five ingredients, precise technique.
Prepare the Aromatics with Precision
In a small saucepan, heat the 1 tablespoon sesame oil over medium-low heat until shimmering but not smoking. Add the 3 minced garlic cloves and cook for 30 seconds until fragrant—you'll smell that sweet garlic aroma before you see it turn just barely golden. Immediately add the 2 tablespoons finely grated fresh ginger and stir constantly for 1 minute until the raw ginger scent disappears and it becomes aromatic.
Here's the thing—ginger burns faster than garlic. Watch closely and remove from heat if it starts to darken. The goal is vibrant color and aroma, not charred bits. Let the mixture cool slightly for 2 minutes before proceeding—this prevents sudden temperature shocks when adding other ingredients.
Build the Sauce Base with Controlled Heat
Return the saucepan to medium heat and add the 0.5 cup light soy sauce. Bring to a gentle simmer, then reduce heat to low and let it cook uncovered for 3-4 minutes until slightly reduced by about 20%. You're looking for a syrupy consistency where the sauce coats the back of a spoon but isn't gluey.
This reduction step concentrates the flavors and removes any raw taste from the aromatics. Stir occasionally with a wooden spoon to prevent sticking—those browned bits on the bottom are flavor bombs, but you don't want them to burn. If the sauce starts to bubble vigorously, reduce heat immediately to maintain gentle simmering.
Sweeten and Finish with Perfect Timing
Remove the saucepan from heat and stir in the 1 tablespoon raw honey. The mixture will bubble gently—let it sit for 1 minute to allow the honey to fully incorporate and mellow out its intensity. Return to low heat for 30 seconds to blend completely, then taste and adjust seasoning.
At this stage, you're balancing five distinct flavors: salty (soy), nutty (sesame), spicy (ginger), aromatic (garlic), and sweet (honey). For a more complex profile, add ½ teaspoon fish sauce if you have it on hand. The sauce should coat your tongue with umami depth followed by a clean finish—never cloyingly sweet or overly salty.
Rest and Strain for Maximum Smoothness
Transfer the sauce to a heatproof bowl and let it cool to room temperature for 10 minutes. This resting period allows the flavors to meld completely. Strain through a fine-mesh sieve to remove any ginger fibers or garlic bits, pressing gently with a spoon to extract maximum flavor. Discard the solids—what remains is your silky, restaurant-quality sauce.
For an extra-smooth version, press the strained sauce through a cheesecloth-lined sieve. The texture should be velvety enough to cling to rice grains without pooling. Store in an airtight container in the refrigerator for up to 5 days or freeze for 3 months. The sauce actually improves overnight as the flavors continue to develop.
Pro Tips For Making Asian Rice Bowl Sauce
- Low and Slow Sizzle: I learned this the hard way—don’t blast the garlic and ginger on high heat. After burning three batches, I finally figured out that a gentle simmer over medium-low for 2-3 minutes lets the flavors meld without turning bitter. The sauce will taste sweeter and more complex, not smoky or harsh.
- Grated, Not Chopped Ginger: Fresh ginger loses its punch when it sits in liquid. Use a microplane or fine grater instead of chopping—this releases the oils and ensures every bite of your rice bowl gets that bright, zesty kick. (Yes, even if you’re impatient like me, skip the food processor.)
- Balance the Honey Last: Add the honey after the garlic and ginger have cooked down, not at the start. This prevents it from burning and turning the sauce bitter—trust me, you’ll taste the difference. Stir it in just before removing from heat, then let the sauce sit for 1 minute to let the flavors settle.
- Sesame Oil: A Drop at a End: That tiny bottle of sesame oil is potent. Add it last—just ½ to 1 teaspoon—right before serving. Too early, and the aroma fades into the sauce. Too late, and you’ll miss the nutty aroma that makes the dish sing. (Pro move: Drizzle it over the bowl instead of mixing it in.)
Creative variations of this recipe
Japanese-Inspired Yuzu Twist
Brighten your sauce with 1 tablespoon yuzu juice (or sub ½ teaspoon citric acid + 1 tsp sugar) for a citrusy Japanese touch. Add it with the honey at the end and simmer for 1 minute—this balances the umami with refreshing acidity. Garnish with toasted sesame seeds for texture. I first tried this after eating at a Tokyo izakaya, and it became my go-to for sushi rice bowls. 🍋
Thai-Inspired Chili-Lime Kick
For a Thai-inspired variation, add 1 teaspoon lime zest and ½ teaspoon chili flakes to the aromatics. Replace honey with 1 tablespoon palm sugar and finish with ½ teaspoon fish sauce. This version pairs perfectly with coconut rice or grilled lemongrass chicken. The lime zest adds a bright aroma that cuts through the richness beautifully. 🌶️
Korean Gochujang Depth
Swap the honey for 1 tablespoon gochujang (Korean chili paste) and add ½ teaspoon rice vinegar when reducing the soy sauce. This creates a spicy-sweet sauce perfect for bibimbap or bulgogi beef bowls. The gochujang adds natural sweetness and a subtle heat that builds complexity. I discovered this version while making Korean fried chicken—it’s a game-changer for rice bowls too. 🔥
Vegan Sweet Chili Glaze
For a vegan-friendly twist, replace honey with 1 tablespoon sweet chili sauce and add ½ teaspoon grated fresh turmeric to the aromatics. This version works beautifully with tofu, tempeh, or roasted vegetables. The sweet chili sauce adds a fruity depth while keeping the sauce vegan. Store it in the fridge for up to 5 days—it’s one of my favorite pantry staples for quick weeknight meals. 🌱
Spicy Peanut Fusion
Blend 1 tablespoon smooth peanut butter into the sauce after straining for a nutty, creamy texture. Add ½ teaspoon sriracha and a pinch of smoked paprika for depth. This fusion sauce is perfect for peanut satay bowls or Vietnamese-style rice dishes. The peanut butter adds richness without overpowering the original flavors. 🥜
Sweet & Smoky Maple-Bourbon
Replace honey with 1 tablespoon maple syrup and add ½ teaspoon bourbon (or apple cider vinegar) when reducing the soy sauce. This smoky-sweet version pairs wonderfully with grilled meats or roasted root vegetables. The bourbon adds warmth that deepens the sauce’s complexity. It’s my secret weapon for fall and winter rice bowls. 🍁
Nutrition facts
Frequently asked questions
Can I make this sauce without fresh ginger or garlic?
Yes! Use ½ teaspoon powdered ginger and 1 teaspoon garlic powder (about one-third the amount) for a similar flavor profile. For best results, toast the spices in the sesame oil for 30 seconds to enhance their aroma. The texture will differ slightly, but the sauce will still deliver great depth of flavor.
How much sauce should I make for a family of four?
This recipe yields about ½ cup of sauce, which is perfect for 2-3 servings. For a family of four, double the recipe to 1 cup total. Pro tip: The sauce thickens slightly when chilled, so err on the side of making a bit extra—it disappears quickly! Store leftovers in the fridge for up to 5 days.
What makes this sauce different from regular soy sauce?
This sauce transforms basic soy sauce into a complex, multi-layered condiment by combining it with aromatic garlic, fresh ginger, and a touch of sweetness. The reduction process concentrates the flavors, while the sesame oil adds nutty depth. Unlike plain soy sauce, this version clings beautifully to rice and proteins, creating a cohesive, restaurant-quality experience in every bite.
Can I use this sauce on non-Asian dishes?
This versatile sauce elevates everything from grilled chicken salads to roasted vegetables or even tacos. The umami-sweet balance works surprisingly well with Western flavors. Try drizzling it over steak sandwiches or mixing it into pasta dishes for an Asian-inspired twist. The key is to use it sparingly at first—its intensity builds as you add more.
Why does my sauce turn bitter after simmering?
Bitter flavors develop when the sauce overheats or reduces too quickly. Keep the heat at low-medium and stir frequently to prevent burning. If it starts to taste bitter, add a pinch of sugar or a splash of water to dilute the intensity. For future batches, reduce the sauce by only 15-20% and taste frequently to maintain balance. The goal is a smooth, velvety texture—not a concentrated syrup.