
Main Courses
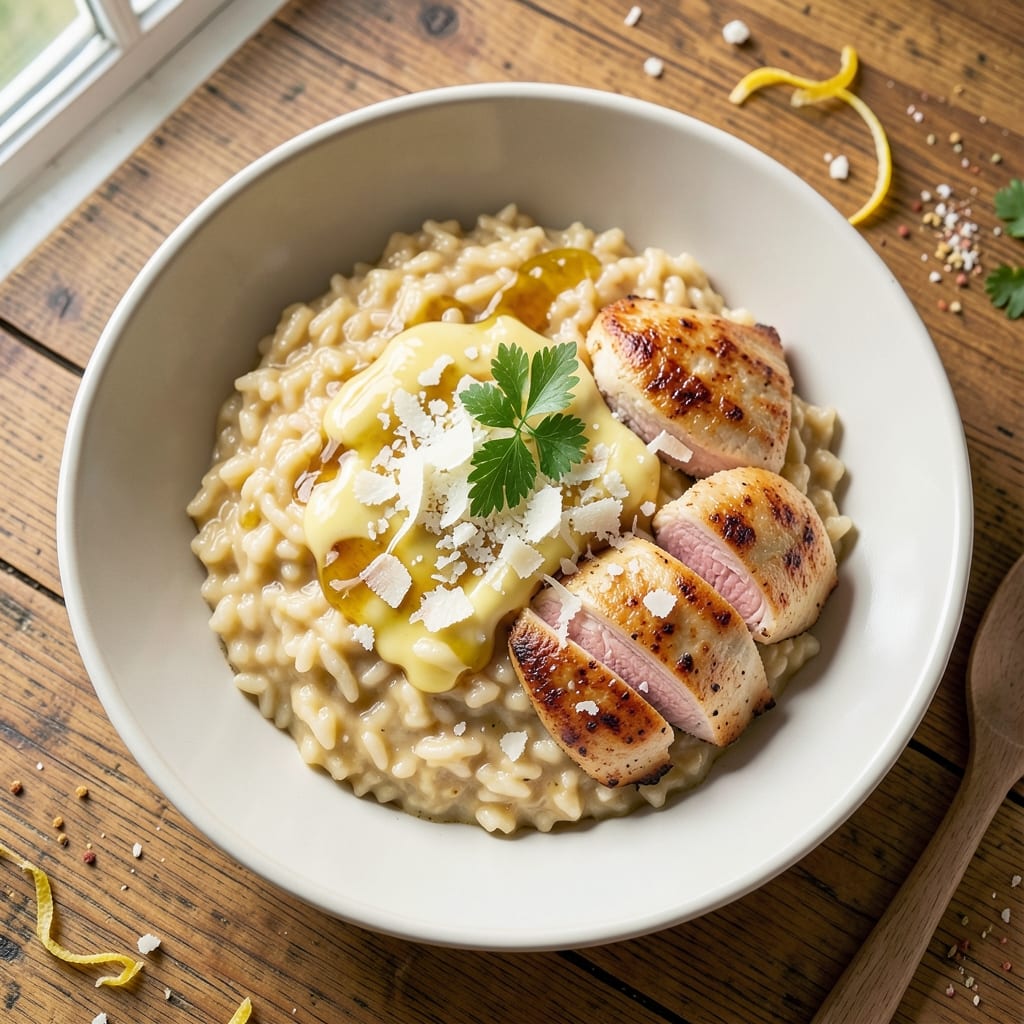
This aroma rice cooker risotto transforms traditional risotto into a one-pot wonder, eliminating the need for constant stirring or a stovetop. The secret lies in leveraging your rice cooker’s built-in aroma function to infuse every grain with rich, creamy depth—no fancy equipment required. What makes this recipe work is balancing liquid ratios and timing to achieve that signature velvety texture without overcooking.
The result is restaurant-quality risotto with tender Arborio rice, perfectly integrated with your choice of protein or vegetables, all achieved with minimal effort. Whether you're feeding a family or meal prepping for the week, this method delivers foolproof, creamy perfection every time. Ready to simplify your weeknight dinners?
Ingredients for aroma rice cooker risotto
Fourteen ingredients, one pot, restaurant-quality risotto without the fuss.
| Ingredient | Amount | Notes |
|---|---|---|
| Arborio Rice 🌾 | 1 ½ cups | Unrinsed, medium-grain preferred |
| Vegetable Broth 💧 | 3 ½ cups | Low-sodium, homemade or quality store-bought |
| White Wine 🍷 | ½ cup | Dry, like Sauvignon Blanc or Chardonnay |
| Butter 🧈 | 4 tbsp | Unsalted, cold for initial step |
| Parmesan Cheese 🧀 | ½ cup | Freshly grated, aged 24+ months |
| Garlic Cloves 🧄 | 3 cloves | Minced, fresh preferred |
| Shallots 🧅 | 2 whole | Minced, or sub with 1 small onion |
| Olive Oil 🫒 | 2 tbsp | Extra-virgin, for initial sauté |
| Salt 🧂 | 1 ½ tsp | Diamond Crystal kosher preferred |
| Black Pepper 🌶️ | ½ tsp | Freshly cracked, coarse grind |
| Fresh Thyme 🌿 | ¼ cup | Leaves only, chopped (or 1 tsp dried) |
| Chicken Breast 🍗 | 1 lb | Boneless, skinless, diced small |
| Mushrooms 🍄 | 8 oz | Cremini or white, sliced |
| Lemon Zest 🍋 | 1 tsp | Fresh, for finishing touch |
Arborio rice is non-negotiable here—its high starch content is what creates that signature creamy texture. Lundberg Farms or Barilla are my go-tos, but any labeled 'Arborio' works. The broth makes all the difference: homemade is ideal, but even Pacific Foods low-sodium from the store delivers. For the protein, I lean toward chicken breast—it stays tender when diced small, but shrimp or white fish would work beautifully too. The mushrooms? Cremini have more earthiness than white, but either will work if that's what's on hand.
No white wine? Substitute extra broth with a splash of lemon juice—it adds brightness. Fresh thyme is ideal, but dried works at one-third the amount. The shallots can be swapped for onion if needed, though they add a subtler sweetness. For the Parmesan, grate it yourself—pre-grated has anti-caking agents that ruin the texture. And if you're short on time, pre-mince the garlic and shallots while you measure other ingredients—saves 5 minutes of chopping later.
This risotto reheats beautifully—just add a splash of broth and stir. Keeps 3-4 days in the fridge, or freeze portions for up to 3 months. For meal prep, cook a double batch and portion into containers with a thin layer of olive oil on top to preserve freshness. The aroma function in your rice cooker does most of the work, but don't skip the initial sauté—it builds that rich foundation flavor that separates good risotto from great.
Why You'll Love This Recipe
- No-Stir Magic: I swear by this—just toss in the Arborio rice, broth, and a splash of white wine, then let the rice cooker do its thing. The butter and Parmesan melt right into the grains, giving you that creamy texture without a single spoonful of effort.
- Umami Bomb: That first bite of buttery Arborio rice kissed by Parmesan? It’s like a hug for your taste buds. The white wine adds a bright, tangy lift that cuts through the richness, making it taste way more expensive than it is.
- Weeknight to Dinner Party: Honestly, this is my secret weapon for when friends drop by unannounced. It’s fancy enough for company but so easy I can make it while scrolling through my phone. (Yes, even on a Tuesday night.)
- Leftovers That Don’t Suck: Most risotto turns into glue after day one, but this? It reheats like a dream—just add a splash of broth and a pat of butter. I’ve even packed it for lunch, and no one’s ever complained. (My coworkers are the real winners here.)
Step-by-step instructions for aroma rice cooker risotto
Here's how to make restaurant-quality risotto with minimal effort in your rice cooker.
Sauté Aromatics and Chicken
Heat the 2 tablespoons olive oil in your rice cooker's inner pot over medium-high heat. Add the 1 pound diced chicken breast and cook until lightly browned on all sides, about 3-4 minutes. Remove the chicken and set it aside temporarily.
In the same pot, add 2 tablespoons butter (2 of the 4 total) and the 2 minced shallots. Cook for 2 minutes until softened. Add the 3 minced garlic cloves and cook for another 30 seconds until fragrant—don't let it brown. Stir in the 0.25 cup chopped fresh thyme and cook for 1 minute to release its aroma.
I like to add the chicken back in now to finish cooking while the risotto develops. Return the chicken to the pot and cook for 3-4 minutes until fully done. Remove the chicken again and set it aside on a plate to keep warm.
Toast the Arborio Rice
Add the remaining 2 tablespoons butter (2 of the 4 total) to the pot and let it melt completely. Add the 1.5 cups unrinsed Arborio rice and stir to coat it evenly in the butter. Toast the rice for 2-3 minutes until it becomes translucent at the edges—this step is crucial for developing that signature risotto texture.
Here's the thing—don't skip this toasting step. It builds flavor and prevents gummy rice. You'll know it's ready when the rice looks slightly glossy and the edges start to turn opaque. This usually takes about 2 minutes over medium heat.
Deglaze with Wine and Add Broth
Pour in the 0.5 cup dry white wine and stir vigorously until completely absorbed. The alcohol will cook off quickly, leaving behind just the flavor. This deglazing step adds depth that you can't get from broth alone.
Add 1 cup of the 3.5 cups vegetable broth to the rice cooker pot. Stir well to combine. Now here's where the magic happens: Set your rice cooker to the "white rice" setting. The rice cooker will automatically maintain the perfect temperature for risotto—no constant stirring required.
Cook Until Al Dente
Let the rice cooker do its work. It will take about 15-18 minutes for the rice to absorb the broth and become tender but still slightly firm to the bite—this is called al dente. The rice cooker will automatically switch to "keep warm" mode when done, which is perfect for risotto.
During this time, you can prepare your finishing touches. Grate the 0.5 cup Parmesan cheese and zest the 1 teaspoon lemon zest. Crack the 0.5 teaspoon black pepper and measure out the 1.5 teaspoons salt for seasoning.
Finish and Serve
Once the rice is cooked, open the rice cooker and stir in the 0.5 cup grated Parmesan cheese and 1 teaspoon lemon zest. Add the 1.5 teaspoons salt and 0.5 teaspoon black pepper, stirring well to combine. The cheese should melt into a creamy sauce that coats the rice beautifully.
Return the chicken to the pot and gently fold it into the risotto. Taste and adjust seasoning if needed—risotto should be rich but not overly salty. The final texture should be creamy with individual rice grains still visible. Serve immediately while still warm, garnished with additional Parmesan if desired.
Pro Tips For Making Aroma Rice Cooker Risotto
- STIR LIKE YOUR LIFE DEPENDS ON IT: The rice cooker’s gentle cycles won’t build risotto’s signature creaminess—you’ve got to manually stir every 5 minutes once the wine’s absorbed. I learned this the hard way when my first batch turned out like glue. Use chopsticks or a wooden spoon to scrape the bottom, and don’t skip the last 10 minutes of stirring even if it feels tedious.
- TOAST THE RICE FIRST: Before adding broth, melt 1 tablespoon of butter in the rice cooker and toast the Arborio rice for 2 minutes until it smells nutty. This isn’t just for flavor—it prevents gummy rice. (Yes, even if you’re impatient like me, resist the urge to rush this step.)
- USE COLD BROTH, NOT HOT: The rice cooker’s heat will warm it up, but starting with cold vegetable broth gives you better control over the cooking process. I was skeptical until I tried it—no more risk of overcooking or burning the rice at the bottom while waiting for the next batch of liquid.
- FINISH WITH PARMESAN AND BUTTER TOGETHER: Once the rice is done, turn off the cooker, stir in 2 tablespoons of cold butter and ¼ cup grated Parmesan, then let it sit for 2 minutes. This creates a silky, emulsified finish that separates risotto from sad rice. (Your future self will thank you for not skipping this.)
Common mistakes when making your aroma rice cooker risotto
Skipping the Toast
Never skip toasting the Arborio rice—this crucial 2-3 minute step builds flavor and prevents gummy texture. The rice should look translucent at the edges before adding liquid. I've ruined risotto by skipping this, and the result was bland, mushy grains. Use medium heat and stir constantly until you see that telltale glossiness. 🔥
Overloading the Pot
Your rice cooker's pot has specific volume limits—check yours before starting. Overfilling prevents proper heat circulation, leading to uneven cooking. I once tried doubling the recipe in my 3-quart Aroma pot and ended up with dry rice on top and mushy rice at the bottom. Stick to the 1.5 cups rice ratio for this recipe.
Using Wrong Broth
Low-quality broth with artificial flavors will ruin your risotto's depth. I recommend homemade or high-quality store-bought like Pacific Foods. Avoid bouillon cubes—they're too salty and lack complexity. If using store-bought, choose low-sodium options and adjust seasoning at the end. The broth should be flavorful but not overpowering.
Adding All Broth at Once
The rice cooker's aroma function helps, but you still need gradual absorption. Adding all 3.5 cups broth at once creates a watery mess. Instead, add 1 cup initially, then let the rice cooker work its magic. If needed, add more broth in ½ cup increments during cooking—this maintains proper texture. 💧
Underseasoning Early
Risotto builds flavor gradually, but that doesn't mean you should hold back on salt. Add 1 tsp salt with the broth and another ½ tsp at the end. I've learned the hard way that underseasoning early leads to bland results. Taste as you go—risotto should be rich but not salty. The Parmesan and lemon zest at the end will brighten the dish naturally.
Ignoring Rest Time
Freshly cooked risotto needs 2-3 minutes off heat to thicken slightly. Serving immediately can make it too loose. I've made this mistake when hungry—always let it rest! Cover the pot for those few minutes to maintain heat. The texture will improve dramatically, giving you that perfect creamy consistency without being gluey. ✨
Nutrition facts
Frequently asked questions about rice cooker risotto
Can I make this risotto without white wine?
Replace the ½ cup white wine with an equal amount of vegetable broth plus 1 teaspoon lemon juice. This keeps the bright acidity that balances the richness. For extra depth, add ½ teaspoon Dijon mustard to the broth—it mimics wine's complexity beautifully.
How do I adjust this for vegetarian risotto?
Swap the chicken for 8 oz sliced mushrooms or 1 cup diced zucchini, and add ½ cup frozen peas at the end. Boost umami with 1 tablespoon nutritional yeast mixed into the Parmesan. For protein, consider ½ cup crumbled feta or ½ cup white beans—both work wonderfully.
Why does my rice cooker risotto turn out dry?
This usually happens when the rice absorbs all liquid too quickly. The rice cooker's aroma function helps, but you may need to add ½ cup more broth during cooking if your model heats faster. Always start with 1 cup broth and check the rice at 12 minutes—if it's still firm, add more.
Can I make this ahead of time?
Yes! Cook the risotto as directed, then spread it on a tray to cool quickly. Store in an airtight container for up to 3 days. To reheat, add 2 tablespoons broth per cup of risotto and warm gently on low heat, stirring until creamy. The texture will be slightly firmer but still delicious.
What's the secret to creamy risotto texture?
The key is toasting the rice until translucent and using the right broth-to-rice ratio (2.3 cups broth per 1 cup rice). The rice cooker's aroma function infuses flavor, but you must stir in the Parmesan and lemon zest at the end—they create the creamy sauce that coats each grain. Never skip the rest time either!