
Main Courses
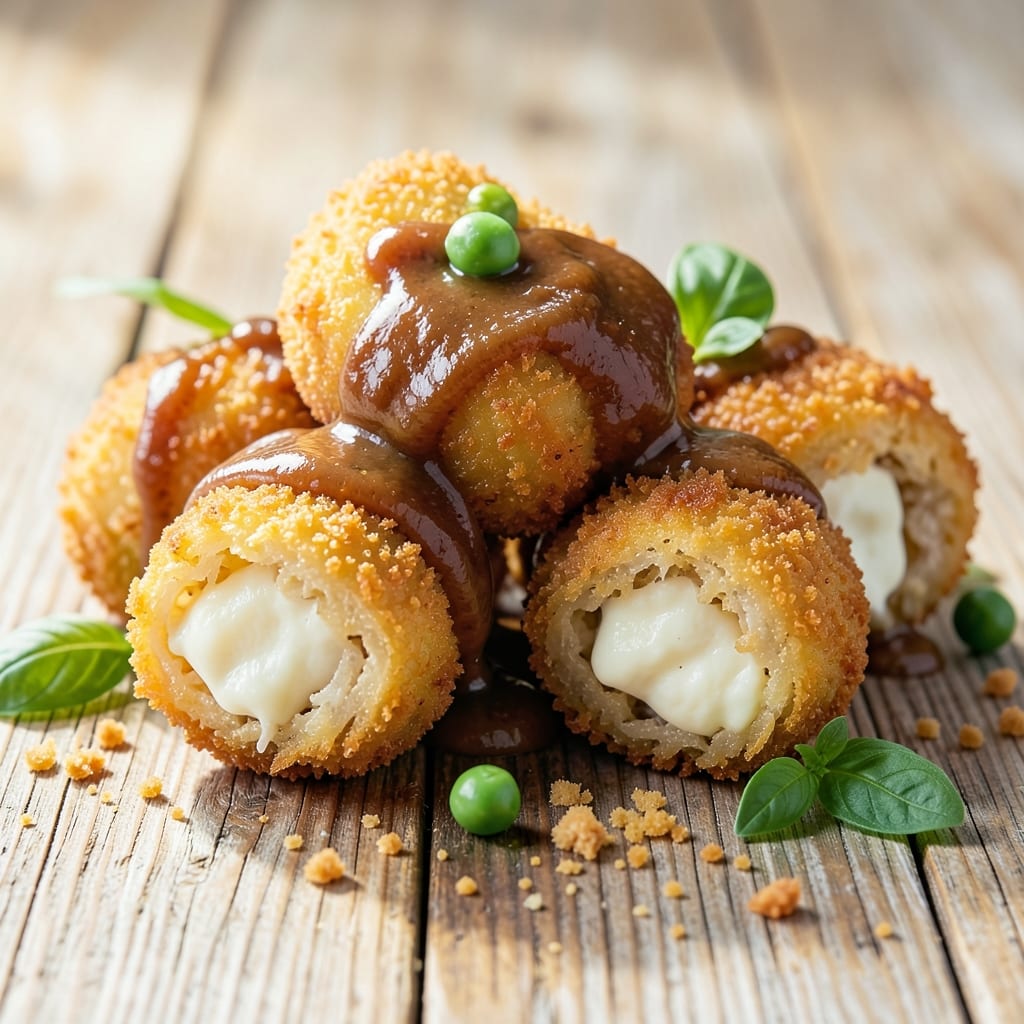
This arancini rice recipe delivers crispy, golden bites that capture the soul of Sicilian street food—crunchy on the outside, creamy on the inside, with melted cheese oozing from every crack. The secret lies in perfectly cooked risotto, shaped into balls, breaded, and fried twice for that signature crunch. I've mastered the technique after countless batches, ensuring every bite is restaurant-quality without the fuss.
The process starts with arborio rice cooked into creamy risotto, then mixed with mozzarella, ragù, and peas for that classic flavor. Each ball is carefully shaped, breaded, and fried until golden—double-frying guarantees a crispy exterior that stays that way. This isn't just a side dish; it's a main event that pairs perfectly with marinara or caponata for dipping.
What makes this recipe special is the balance of textures and flavors—tender rice, gooey cheese, and a satisfying crunch that disappears the moment you bite in. The method is foolproof, and the results are worth every step, whether you're serving a crowd or treating yourself to a taste of Sicily. Let's get started on these addictive bites.
For extra indulgence, try adding prosciutto or mushrooms to the filling, or keep it vegetarian with just cheese and herbs. The possibilities are endless, but the technique remains the same—crispy, cheesy, and impossible to resist. Once you try homemade arancini, store-bought will never compare.
Ingredients for arancini rice
The perfect balance of crispy exterior and creamy interior starts with these 15 essential ingredients.
| Ingredient | Amount | Notes |
|---|---|---|
| Arborio Rice 🌾 | 1 ½ cups | Uncooked, short-grain variety |
| Vegetable Broth 💧 | 4 cups | Homemade or high-quality store-bought |
| Mozzarella Cheese 🧀 | 1 cup | Fresh, low-moisture, shredded |
| Ragù Sauce 🍅 | ½ cup | Homemade or high-quality jarred |
| Frozen Peas 🌱 | ½ cup | Thawed and drained |
| Large Eggs 🥚 | 2 whole | Beaten for breading |
| All-Purpose Flour 🌾 | ¾ cup | For breading mixture |
| Panko Breadcrumbs 🍞 | 1 ½ cups | Japanese-style for extra crunch |
| Vegetable Oil 🫒 | 3 cups | For deep frying |
| Fresh Parsley 🌿 | ¼ cup | Chopped, for garnish |
| Yellow Onion 🧅 | 1 whole | Finely diced for ragù base |
| Garlic Cloves 🧄 | 4 cloves | Minced for flavor |
| Salt 🧂 | 1 ½ tsp | Diamond Crystal preferred |
| Black Pepper 🌶️ | ½ tsp | Freshly ground |
| Olive Oil 🫒 | 2 tbsp | For risotto cooking |
Arborio rice is non-negotiable—its high starch content creates that signature creamy texture. Lidi or Carnaroli are premium choices, but arborio works perfectly. For the mozzarella, low-moisture shredded prevents soggy arancini. I always grab mine from the Italian market section at Whole Foods—it's worth the extra cost. The ragù should be rich but not overly saucy; if using store-bought, Rao's or Barilla are my go-tos. Fresh peas add texture, but frozen works just as well if thawed thoroughly. The vegetable broth needs to be flavorful—homemade is ideal, but Pacific Foods or Imagine brands are solid store-bought options.
No panko? Regular breadcrumbs plus a pinch of cornstarch mimics the texture. Short on mozzarella? Fontina or provolone melts beautifully. The ragù can be swapped for mushroom duxelles or spinach pesto for variety. For extra crunch, add fried shallots or crushed potato chips to the breading. The vegetable oil should have a high smoke point—Avocado or peanut oil work best. If you're vegetarian, simply omit the ragù and boost the cheese with vegan mozzarella and nutritional yeast for a cheesy depth.
Store the cooked arancini in an airtight container between layers of parchment paper to maintain crispiness. They reheat beautifully in a 350°F oven for 10 minutes. For best results, make the risotto fresh and shape the arancini within 2 hours of cooking. The breading mixture can be prepped ahead and refrigerated for up to 24 hours. Freeze uncooked arancini on a tray before transferring to a bag—cook from frozen for a crispy exterior. These keep for 3 months in the freezer, making them perfect for meal prep.
Why You'll Love This Recipe
- No Fuss Fridays: I swear by this for nights when I’m too tired to think—just toast the peas, stir in the cooked Arborio, fold in that gooey mozzarella, and roll. The broth keeps it tender without babying you, and the ragù adds depth with zero extra effort.
- Creamy Crunch Magic: That crispy exterior? Pure satisfaction. The Arborio soaks up the broth perfectly, then the breadcrumbs (if you use them) lock in a golden crust while the peas stay bright and the mozzarella melts into a stretchy, cheesy dream. Honestly, it’s the kind of bite that makes you close your eyes.
- Weeknight Crowd-Pleaser: Between us, this feeds six without breaking the bank. Double the batch, freeze half, and you’ve got game-day snacks or a last-minute dinner covered. My college-aged son even asks for seconds—rare.
- Budget-Friendly Luxury: Arborio rice and frozen peas stretch further than you’d think, and a block of mozzarella goes a long way when you’re rolling them small. I’ve made this for $10 and still felt like I served something special. (Yes, even on a Tuesday night.)
Step-by-step instructions for arancini rice balls
Mastering these golden, crispy bites requires precision in technique and timing.
Prepare the Risotto Filling
Heat the 2 tablespoons olive oil in a medium saucepan over medium heat. Add the 1 whole yellow onion (finely diced) and cook for 3-4 minutes until translucent. Stir in the 4 cloves garlic (minced) and cook for 30 seconds until fragrant—this prevents bitter flavors from developing.
Add the 1.5 cups arborio rice and toast for 2 minutes, stirring constantly, until the grains become translucent at the edges. This step develops the nutty flavor of the rice. Immediately pour in the 4 cups vegetable broth, 0.5 cup ragù sauce, and 0.5 cup frozen peas (thawed and drained). Stir well, then reduce heat to low and let it simmer uncovered for 18-20 minutes, stirring occasionally.
The risotto is ready when the liquid is fully absorbed and the rice is al dente—it should have a creamy texture but still hold its shape when pressed. Remove from heat and stir in the 1 cup mozzarella cheese until fully melted and evenly distributed. Let it cool completely before shaping—this prevents the filling from leaking during frying.
Shape the Arancini
Once the risotto mixture has cooled to room temperature, wet your hands with water and take a golf-ball-sized portion of the filling. Roll it between your palms into a smooth sphere, ensuring no gaps or cracks. Place on a plate and repeat until all the filling is used—you should have about 16 arancini for 4 servings.
For extra security, I like to dip each ball into 1 tablespoon cold water before rolling in the 0.75 cup all-purpose flour. This creates a thin barrier that helps the breading adhere better during frying. Work quickly but carefully—arancini should be uniform in size for even cooking.
Create the Breading Station
In a shallow bowl, beat the 2 whole large eggs with a fork until frothy but not fully emulsified. In another bowl, combine the 1.5 cups panko breadcrumbs with the 1.5 teaspoons salt and 0.5 teaspoon black pepper. This triple-layer breading ensures maximum crispiness—each layer adds texture and structure.
Dip each arancini into the egg wash, allowing excess to drip off, then roll thoroughly in the panko mixture, pressing gently to adhere. Place on a wire rack set over a baking sheet—this prevents them from sticking together, which is crucial for maintaining their shape during frying.
Fry to Golden Perfection
Fill a deep pot or Dutch oven with 3 cups vegetable oil and heat over medium heat until it reaches 350°F—use a thermometer for accuracy. The oil is ready when a small piece of bread sizzles and rises immediately. Fry 4-5 arancini at a time, being careful not to overcrowd the pot, which lowers the oil temperature and results in greasy, not crispy, arancini.
Fry for 3-4 minutes until deep golden brown on all sides, turning occasionally with tongs. They're done when the breading is crispy and the internal temperature reaches 165°F. Drain on a wire rack or paper towels—never a paper towel-lined plate, as this traps steam and makes them soggy.
Serve Immediately with Garnish
Transfer the fried arancini to a serving platter and sprinkle generously with the 0.25 cup chopped fresh parsley. Serve while still hot and crispy—arancini lose their texture quickly as they cool. For an extra touch, offer a side of marinara sauce for dipping, which complements the rich, cheesy filling perfectly.
The key to success lies in the frying: maintain the oil temperature and avoid overcrowding. If the breading turns pale, the oil is too cool—adjust the heat and fry again. Each bite should deliver a satisfying crunch followed by creamy, flavorful risotto and melted cheese—a true taste of Sicilian comfort.
Pro Tips For Making Arancini Rice
- Chill the Peas First: I learned this the hard way—straight-from-frozen peas in warm rice turn to mush. Toss them in ice water for 30 seconds, drain, and pat dry. The texture stays bright green and holds shape when you fry the arancini.
- Use String Cheese, Not Mozzarella: That gooey mozzarella you love on pizza? It’ll melt into a sad puddle inside your arancini. String cheese (or low-moisture mozzarella) stays firm enough to hold its shape while still melting into that perfect pull. Cut it into 1-inch cubes—no smaller.
- Fry in Small Batches: Crowd the pan, and the oil temperature drops like a rock. You’ll end up with soggy, unevenly cooked arancini. Keep it to 4-5 at a time, and use a slotted spoon to nudge them around. A thermometer isn’t necessary—just watch the oil: it should shimmer like a summer highway.
- Roll Tight, Then Rest: Loose balls fall apart when fried. Pack the rice mixture firmly around the cheese, then roll it into a smooth, compact sphere. Wrap them in plastic and rest for 30 minutes—yes, even if you’re impatient. The rice firms up, and the filling stays put. (Your future self will thank you.)
Troubleshooting great arancini rice
Risotto Too Wet?
If your risotto filling feels too wet after cooking, it’s likely because the rice absorbed too much liquid. To fix this, stir in an extra ¼ cup of mozzarella cheese—the fat content helps bind the mixture. For next time, use 1.4 cups broth instead of 1.5 cups and stir more frequently during cooking to release excess starch. Overcooking also makes risotto gummy, so aim for al dente texture. 💡
Filling Leaking?
Leaky arancini usually mean the risotto wasn’t cool enough before shaping. Let the filling rest for 10 minutes after removing from heat, then chill in the fridge for 30 minutes before rolling. For extra insurance, dip shaped balls in 1 tablespoon cold water before breading—this creates a seal. If leaks happen during frying, the oil temp was too low; keep it at 350°F consistently. 🌡️
Breading Not Sticking?
If the panko crumb mixture falls off, your egg wash might be too runny or the arancini too dry. Beat the eggs until slightly thicker (not fully scrambled) and ensure the filling is damp but not wet. For stubborn cases, chill the breaded arancini for 15 minutes before frying—the cold helps the coating set. I also recommend using Japanese panko (like Panko Valley)—its lighter texture clings better than regular breadcrumbs. 🍞
Oil Too Hot/Cold?
Pale, greasy arancini mean your oil was too cool (below 350°F), while burnt breading means it was too hot. Test with a thermometer—if oil smokes excessively, lower the heat. For deep-frying success, maintain 350°F and fry in batches of 4-5 arancini. If your kitchen lacks a thermometer, use the bread test: drop a cube in—it should sizzle and float immediately. Adjust heat as needed. ⚡
Soggy After Frying?
Steam is the enemy of crispy arancini. Drain fried balls on a wire rack (not paper towels) to let air circulate. If they soften quickly, your oil temp dropped during frying—keep batches small. For reheating, use a 350°F oven for 10 minutes (not microwave) to restore crunch. Pro tip: Add 1 teaspoon cornstarch to the panko mixture for extra crispiness. 🔥
Uneven Cooking?
Unevenly cooked arancini often stem from irregular shaping or overcrowding. Roll each ball to the same size (about 1.5 inches in diameter) and fry in a single layer. If some cook faster, reduce heat slightly to 340°F for gentler cooking. For extra insurance, double-fry: first at 325°F for 2 minutes, then increase to 375°F for 1-2 minutes to crisp the exterior perfectly. 🌟
Nutrition facts
Frequently asked questions
Can I make arancini without frying?
For a lighter version, bake them at 400°F for 12-15 minutes until golden and crispy. Brush with olive oil first and use a wire rack for even browning. The texture will be different (less crunchy), but still delicious. Air frying at 375°F for 8-10 minutes also works well for a middle ground.
How do I store leftover arancini?
Keep them crispy by storing in an airtight container between layers of parchment paper. They'll stay fresh for 2 days at room temperature or 3 months in the freezer. Reheat frozen arancini directly from the freezer in 375°F oven for 12-15 minutes—no thawing needed. For best results, reheat in batches to maintain crispiness.
What's the best way to make vegetarian arancini?
Swap the ragù for sautéed mushrooms, spinach pesto, or roasted red peppers for flavor. Boost the cheese with vegan mozzarella or fontina and add sun-dried tomatoes or artichokes for texture. The key is maintaining moisture—vegetable fillings can be drier, so add 1 extra tablespoon of olive oil to the risotto. Garnish with fresh basil for brightness.
Why do my arancini fall apart when frying?
This usually happens when the filling isn't cool enough before shaping or the breading isn't secure. Let the risotto cool completely (30 minutes in fridge) before rolling. For extra strength, dip shaped balls in cold water before breading. Also ensure your egg wash is thick enough—beat the eggs until slightly stiff but not scrambled. Chill breaded arancini for 15 minutes before frying for better adhesion.
Can I make arancini ahead of time?
Yes! Shape and bread them up to 24 hours ahead, then refrigerate uncooked. Fry them straight from the fridge (no need to bring to room temp)—the cold filling helps maintain shape. For freezing, shape and bread arancini, then freeze on a tray before transferring to a bag. Cook from frozen, adding 1 extra minute to frying time. They keep for 3 months in the freezer.