
Side Dishes
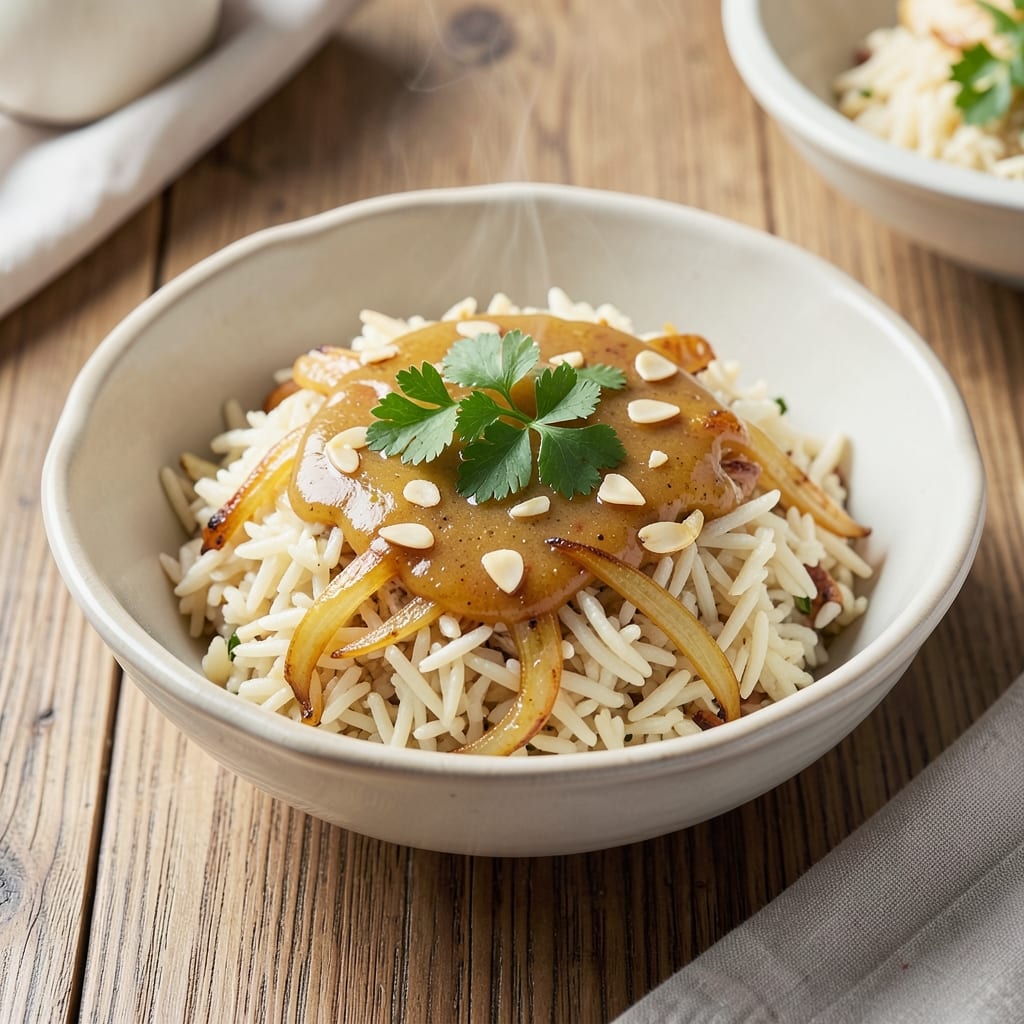
Applebee's rice pilaf recipe delivers that signature buttery, golden dish with crisp edges and tender basmati bites you crave. 💛 The secret lies in toasting the rice and onions until deep brown—this creates the nutty depth and caramelized texture that sets it apart from basic pilafs. I've recreated this version after years of analyzing what makes Applebee's pilaf so special, and it's all in the technique: high heat, proper liquid ratios, and a slow simmer that develops rich, savory flavors.
This recipe starts with sautéing onions and garlic until perfectly golden, then toasting basmati rice until it's fragrant and slightly nutty. The key moment comes when you add chicken broth and butter—simmering uncovered allows the liquid to reduce just enough to create those signature crisp edges while keeping the centers tender. Fresh parsley at the end adds that bright, fresh finish that balances the rich flavors.
What you'll end up with is restaurant-quality rice pilaf that's ideal as a side dish or even as a light main course when paired with grilled chicken or fish. The grains remain separate and fluffy, with that perfect balance of buttery richness and subtle garlic flavor that makes it so addictive. Every bite delivers the same satisfaction as the restaurant version, but now you can make it at home with consistent results.
Perfect for family dinners, holiday gatherings, or when you're craving that Applebee's comfort without the wait. The recipe scales easily for crowds, and leftovers reheat beautifully—just add a splash of water or broth to restore moisture. Here's how to recreate this beloved dish in your own kitchen with professional results every time.
Ingredients for applebee's rice pilaf
Golden, crisp-edged pilaf starts with these simple buttery staples—just 11 ingredients for restaurant-quality flavor.
| Ingredient | Amount | Notes |
|---|---|---|
| Basmati Rice 🍚 | 1 ½ cups | Uncooked, long-grain preferred |
| Yellow Onions 🧅 | 1 ½ cups | Thinly sliced, about 2 medium onions |
| Garlic Cloves 🧄 | 4 cloves | Minced, about 1 tbsp |
| Unsalted Butter 🧈 | ½ cup | Full-fat for best flavor |
| Chicken Broth 💧 | 3 cups | Low-sodium preferred |
| Fresh Parsley 🌿 | ¼ cup | Chopped, for garnish |
| Salt 🧂 | 1 ½ tsp | Kosher or sea salt |
| Black Pepper 🌶️ | ½ tsp | Freshly ground preferred |
| Dried Thyme 🌿 | 1 tsp | Or 1 tbsp fresh thyme |
| Vegetable Oil 🫒 | 2 tbsp | For sautéing |
| Lemon Juice 🍋 | 1 tbsp | Optional, for brightness |
The basmati rice is non-negotiable—it's the only rice with that signature fluffy texture. Lundberg Family Farms or Mahatma are my go-tos, but any premium basmati works. The onions? Yellow onions caramelize best—avoid red or white. I always grab extra butter (the full-fat kind) because it's worth the splurge for that rich, golden finish. The chicken broth should be low-sodium—Swanson or Pacific Foods are my pantry staples. Pro tip: toast the rice and onions until deep brown—they'll release natural sugars that create that signature caramelized flavor.
No chicken broth? Vegetable broth works just fine, though the flavor will be slightly different. Fresh thyme is ideal, but dried works at one-third the amount. If you're short on time, pre-minced garlic from the jar is fine (just rinse it first). The lemon juice is optional, but it adds a bright finish that cuts through the richness—freshly squeezed is best. For extra depth, add a pinch of smoked paprika to the butter while melting. And if you're making this for a crowd, double the recipe—it reheats beautifully.
Store leftovers in an airtight container for up to 4 days—the flavors actually improve overnight. To reheat, add a splash of water or broth and cover until warm. The rice will dry out if left uncovered, so keep it sealed. Freezes for 3 months too, though texture might be slightly softer after thawing. For best results, use within a week. And if you're prepping for a party, make it a day ahead—the flavors meld even better.
Why You'll Love This Recipe
- One-Pot Magic: I swear by this recipe because it’s literally one pot—no fancy tools, no stress. Just chop onions, toast garlic in butter, add rice and broth, and walk away. The basmati fluffs up perfectly on its own, and honestly? That’s half the battle won.
- Buttery Garlic Bomb: That first bite of crispy, golden-brown rice with melted butter and garlic? It’s like a hug for your taste buds. The onions caramelize just enough to add sweetness, and the chicken broth ties it all together—rich but not heavy. My husband licks the pan afterward. (Yes, even on a Tuesday night.)
- Lunchbox Hero: This pilaf is my meal prep bestie. It reheats beautifully—no mushy rice here—and pairs with everything: grilled chicken, roasted veggies, or straight up with a fork. I make a big batch on Sundays, and by Wednesday, I’m still eating it cold from the fridge. (No judgment.)
- Budget-Friendly Staple: Five ingredients, zero guilt. Basmati rice lasts forever, onions and garlic are cheap, and a box of broth stretches this into multiple meals. I’ve fed a houseful of friends for under $10 using this recipe—plus, the leftovers taste just as good the next day. That’s what I call a win.
Step-by-step instructions for Applebee's-style rice pilaf
Here's how to create that signature golden crust and buttery texture—just like the restaurant.
🍳 Step 1: Sauté the Aromatics in Butter and Oil
Heat a large skillet or deep sauté pan over medium heat. Add the 2 tablespoons vegetable oil and ½ cup unsalted butter and let them melt together. You'll want the butter to foam slightly before adding anything else—this ensures maximum flavor extraction.
Add the 1.5 cups thinly sliced yellow onions and cook for 5-6 minutes until they're soft and translucent, stirring occasionally. Here's the thing—don't rush this step. You want the onions to caramelize just slightly at the edges, which adds depth to the pilaf. After the onions soften, add the 4 cloves minced garlic and 1 teaspoon dried thyme, cooking for another 30 seconds until fragrant. This aromatic base is what makes the pilaf taste so rich and inviting.
👨🍳 Step 2: Toast the Rice for Perfect Texture
Stir in the 1.5 cups basmati rice and spread it evenly in the pan, making sure every grain gets coated with the butter and oil mixture. Toast the rice for 2-3 minutes, stirring constantly, until it turns a beautiful golden color. This toasting step is crucial—it creates that signature crispy texture on the edges while preventing the rice from becoming mushy.
I press down gently on the rice with a wooden spoon during the first minute to ensure even contact with the pan. This prevents it from curling and ensures every grain gets that perfect golden crust. You'll know it's ready when the rice smells nutty and the edges start to turn golden brown. Don't walk away—this happens fast!
🥘 Step 3: Deglaze and Add Broth
Pour in the 3 cups chicken broth all at once and add 1.5 teaspoons salt and ½ teaspoon black pepper. Stir everything together gently—you want to distribute the broth evenly without breaking up the rice too much. Here's where it gets fun: bring the mixture to a gentle boil, then immediately reduce the heat to low and cover the pan tightly with a lid.
Let it simmer for 15 minutes without peeking. The rice needs to steam undisturbed so it absorbs the broth evenly and develops that perfect fluffy texture. If you peek too early, you'll release steam and potentially dry out the rice. After 15 minutes, remove the lid and check for doneness. The rice should be tender but still have a slight bite—it'll finish cooking from the residual heat.
⏰ Step 4: Finish with Lemon and Rest
Stir in the 1 tablespoon lemon juice (if using) and ¼ cup chopped fresh parsley. The lemon adds a bright, fresh finish that cuts through the richness of the butter and chicken broth. Taste and adjust seasoning if needed—you might need a little more salt to balance the acidity.
Transfer the pilaf to a serving dish and let it rest for 5 minutes before serving. This resting period allows the flavors to meld and the rice to plump up even more. The result should be golden edges with tender, fluffy grains throughout. If you're serving it immediately, give it a gentle fluff with a fork before plating—this helps separate the grains and gives it that restaurant-quality presentation.
Pro Tips For Making Applebee'S Rice Pilaf
- Toast the Onions: Cook the onions until they’re deep golden—not just soft, but that caramelized stage where they smell like a French bistro. I used to rush this step, and the flavor just never hit the same. Take your time here, or the whole dish will taste flat. ---
- Use Cold Broth: Add the chicken broth cold after the rice is cooked, then stir it in. The shock of cold liquid stops the cooking process instantly, which keeps the grains separate and fluffy. Hot broth? You’ll end up with mush—trust me, I’ve done it. ---
- Salt the Butter: Skip the extra salt if your butter is unsalted—add ½ teaspoon per ¼ cup of butter right into the pot. I learned this the hard way when my pilaf turned out bland, and now I season it upfront so I don’t forget. ---
- Don’t Stir the Rice: Once the broth is added, resist the urge to stir. Let it sit undisturbed for 5 minutes before fluffing with a fork. Stirring releases starch and turns your perfect pilaf into glue—your future self will thank you for the patience.
Creative variations of applebee's rice pilaf
Protein-Packed Pilaf
Transform this into a main course by stirring in 1 cup cooked chicken breast or ½ cup diced ham during the final 5 minutes of simmering. For extra richness, fold in ½ cup shredded cheddar cheese right before serving. I love adding ½ cup diced bell peppers with the onions for a colorful twist that keeps the dish vibrant. 💛
Vegetarian Version
Swap the chicken broth for 3 cups vegetable broth and add ½ cup frozen peas and carrots during the last 5 minutes of cooking. For extra protein, stir in ½ cup crumbled feta cheese at the end. Fresh herbs like ¼ cup chopped dill or 1 tablespoon dried oregano add Mediterranean flair. This version works beautifully as a side for grilled vegetables or as a standalone dish.
Spicy Southwest Style
Boost the flavor with 1 teaspoon smoked paprika and ½ teaspoon cayenne pepper when sautéing the onions. Add ½ cup diced jalapeños and ½ cup corn kernels during the last 5 minutes of cooking. Finish with ¼ cup chopped cilantro and a squeeze of lime juice instead of lemon. Serve with black beans and grilled shrimp for a fiesta-style feast. 🌶️
Herb-Infused Variations
Swap the thyme for 1 teaspoon dried rosemary or 1 tablespoon fresh tarragon for a French-inspired twist. For Italian flair, add ½ teaspoon dried basil and finish with ¼ cup chopped basil leaves**. A touch of lemon zest brightens the dish while adding visual appeal. These herb variations work especially well with grilled fish or roasted chicken.
Make-Ahead Party Pilaf
Double the recipe and prepare it a day ahead for gatherings. The flavors deepen as it rests, and it reheats beautifully. For extra crowd appeal, divide the pilaf into individual portions and top each serving with 2 tablespoons shredded mozzarella and ¼ cup marinara sauce before baking at 375°F for 10 minutes to create crispy, cheesy topping. This makes an impressive appetizer or side dish that disappears fast. ✨
Nutrition facts
Frequently asked questions
Can I use jasmine rice instead of basmati?
While jasmine rice will cook, it won't give you that signature fluffy texture and nutty flavor. Basmati rice is essential for this recipe—its long grains stay separate and develop those crisp golden edges. If you're set on jasmine, you'll need to adjust the cooking time and liquid ratio significantly, but it won't taste the same as the restaurant version.
Why does my pilaf turn out mushy?
Mushy rice usually means one of two things: too much liquid or not enough toasting time. First, make sure you're toasting the rice for 2-3 minutes until golden before adding broth. Second, use the exact 3 cups of broth—don't substitute with water. Also, avoid peeking under the lid while it simmers, as this releases steam and can make the rice gummy.
Can I make this in an Instant Pot?
Sauté the onions, garlic, and rice in the pot first, then add the broth and seal. Cook on high pressure for 4 minutes, then quick-release. Finish with lemon juice and parsley. The texture will be slightly different (more tender), but it's a great time-saving method. Just be careful not to overcook—basmati rice can get mushy fast in a pressure cooker.
How do I make this dish vegetarian?
Swap the chicken broth for vegetable broth and add ½ cup frozen peas and carrots during the last 5 minutes of cooking. For extra protein, stir in ½ cup crumbled feta cheese at the end. Fresh herbs like dill or oregano add great flavor. The dish will still be rich and satisfying without any meat.
Can I prepare this ahead of time for a party?
Yes! This pilaf actually tastes better the next day as the flavors meld. Make it a day ahead and store in an airtight container. Reheat by adding a splash of water or broth and covering until warm. For extra crowd appeal, divide into portions and top with mozzarella and marinara before baking at 375°F for 10 minutes to create crispy, cheesy topping.