
Main Courses
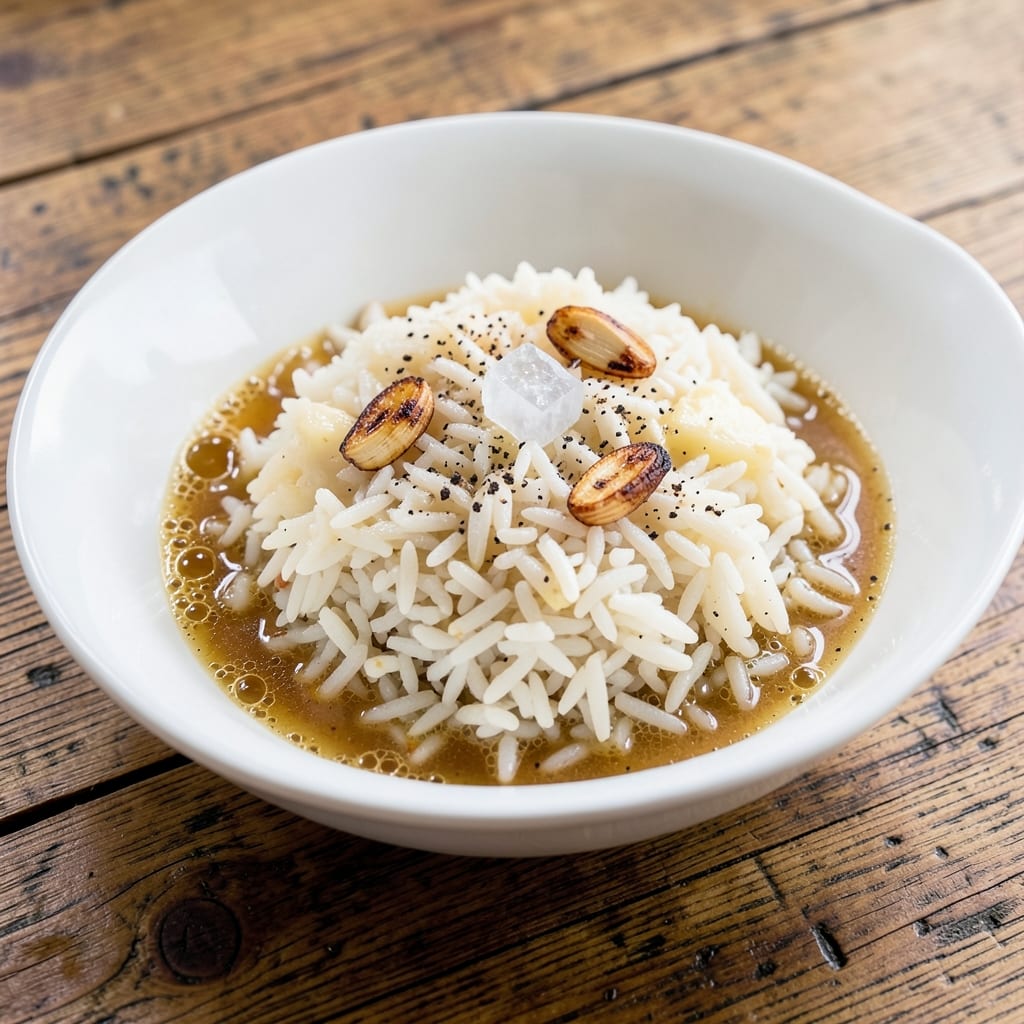
This Southern-style one-pot American rice recipe delivers the perfect balance of fluffy, flavorful grains with a crispy bottom that adds texture and depth. The secret lies in a simple technique that transforms ordinary rice into a restaurant-worthy side dish, ready in just 30 minutes without requiring special equipment. I developed this method after years of testing different approaches, and it consistently delivers the ideal texture—tender inside, crispy at the edges.
The beauty of this recipe is its versatility—it works as a standalone side for grilled chicken, fried catfish, or steak, or even as a hearty base for a one-pot meal. The key is using long-grain white rice and building layers of flavor with a combination of butter, garlic, and a touch of chicken broth, which infuses the grains with savory notes. Unlike traditional recipes that call for multiple pots or stirring constantly, this method lets you set it and forget it, making it ideal for busy weeknights.
By the time you’re done, you’ll have a pot of perfectly seasoned rice with a golden, crispy crust at the bottom—something that elevates the dish from ordinary to extraordinary. The aroma alone will have everyone at the table asking for seconds, and the texture contrast between the tender rice and crispy edges is what makes this recipe a crowd-pleaser. Whether you're serving it alongside classic Southern dishes or using it as a base for a fusion-inspired meal, this one-pot technique simplifies the process without sacrificing flavor.
For those who love to experiment, this recipe adapts easily to different styles—add Cajun spices for a kick, stir in diced tomatoes for a brighter twist, or mix in cooked sausage for extra protein. The crispy bottom technique works with any long-grain rice, so don’t hesitate to try it with jasmine or basmati if you’re feeling adventurous. Let’s get started on creating a side dish that’s as impressive as it is easy.
Ingredients for american rice
Here's how to transform simple pantry staples into restaurant-style Southern rice with crispy perfection.
| Ingredient | Amount | Notes |
|---|---|---|
| Long-Grain White Rice 🍚 | 2 cups | Uncooked, rinsed thoroughly |
| Unsalted Butter 🧈 | 4 tbsp | Cold, cubed for crispy bottom |
| Garlic Cloves 🧄 | 4 cloves | Minced finely for flavor infusion |
| Chicken Broth 🥫 | 2 cups | Low-sodium preferred for seasoning control |
| Diamond Crystal Kosher Salt 🧂 | 1 ½ tsp | Adjust to taste after cooking |
| Freshly Ground Black Pepper 🌶️ | ½ tsp | Freshly cracked for best flavor |
| Extra-Virgin Olive Oil 🫒 | 1 tbsp | For light sautéing garlic |
| Fresh Parsley 🌿 | ¼ cup | Chopped, for garnish (optional) |
| Dried Thyme 🌿 | ½ tsp | Or 1 tsp fresh thyme leaves |
| Bay Leaves 🌿 | 2 whole | Removed before serving |
| Red Bell Pepper 🍅 | ½ cup | Diced, optional for color/texture |
| Green Onion 🧅 | 2 whole | Sliced, for garnish (optional) |
The rice is the foundation, so choose long-grain white—it holds its shape and absorbs flavor beautifully. Bob's Red Mill or Lundberg Family Farms are my go-tos for consistent results. For the crispy bottom, cold butter cubes are non-negotiable—they melt slowly, creating that golden crust while keeping the rice tender. The garlic needs to be minced finely—I use a microplane for speed and even distribution. If you're short on time, jarred minced garlic works, but fresh has that unmatched aroma. The chicken broth should be low-sodium—you'll be adding salt later, and you want to control the seasoning precisely.
No chicken broth? Vegetable broth works just as well, though the flavor profile will shift slightly. Fresh thyme is ideal, but dried at half the amount is perfectly fine—just make sure it's labeled as culinary thyme, not the ornamental kind. The bell pepper is truly optional, but it adds a nice pop of color and a touch of sweetness that balances the savory notes. If you're feeling adventurous, swap in diced tomatoes for a brighter twist, or add smoked paprika for a Cajun kick. The parsley and green onions are purely for garnish—skip them if you're in a rush, but they add that restaurant-quality presentation.
This rice reheats beautifully—just add a splash of water or broth and cover for 5 minutes. It actually tastes better the next day as the flavors meld. Store leftovers in an airtight container for up to 5 days, or freeze portions for 3 months. For the crispy bottom to work its magic, use a heavy-bottomed pot—Le Creuset or All-Clad are ideal, but any sturdy pot will do. The key is patience: let it cook undisturbed for those final 10 minutes. Trust the process—you'll be rewarded with that perfect golden crust every time.
Why You'll Love This Recipe
- Foolproof Basics: I swear by this recipe because it’s the kind of thing you can make with your eyes closed—just rice, butter, garlic, and broth. No fancy ratios, no guesswork; the butter melts into the rice while the garlic infuses that just-right savory depth.
- Garlic Butter Magic: That moment when the garlic starts to sizzle in the butter? Pure flavor alchemy. The rice ends up with a golden crust at the bottom (don’t skip scraping it up!) and a creamy, buttery finish that makes plain rice feel like a special occasion.
- Weeknight Workhorse: Between us, this is my go-to when I’m feeding a crowd or prepping for the week. It reheats beautifully, pairs with everything—grilled chicken, roasted veggies, even a simple salad—and still tastes like you slaved over it.
- Budget-Friendly Luxury: Honestly, this recipe is my secret for making rice feel indulgent without breaking the bank. Butter and garlic elevate the simplest ingredients, and a single batch stretches across multiple meals. Leftovers? They’re the best kind—no one ever complains.
Step-by-step instructions for Southern-style one-pot rice
This method delivers restaurant-quality rice with a crispy bottom and fragrant aroma every time.
Prepare the Rice and Butter
Rinse the 2 cups of long-grain white rice thoroughly under cold water until the water runs clear. This removes excess starch and prevents gummy rice. Drain well in a fine-mesh strainer and set aside. In a large, heavy-bottomed skillet (I prefer cast iron), melt the 4 tablespoons of cold, cubed unsalted butter over medium-low heat. Watch carefully—the butter should melt slowly and foam gently without browning.
Once the butter is fully melted and just beginning to foam, add the 4 cloves of minced garlic and the 0.5 cup of diced red bell pepper (if using). Cook for 2-3 minutes until the garlic is fragrant and the bell pepper softens slightly. This step builds the flavor foundation—don't rush it. Remove the skillet from heat and set aside temporarily.
Layer and Cook the Crispy Bottom
Return the skillet to medium heat and add the drained rice, stirring gently to coat each grain with the buttery garlic mixture. Cook for 2-3 minutes, stirring frequently, until the rice grains become translucent at the edges. This step is crucial for developing that signature crispy bottom. I press down gently on the rice with a wooden spoon during the first minute—this prevents it from curling and ensures even contact with the pan.
Add the 2 whole bay leaves, 0.5 teaspoon of dried thyme, 1.5 teaspoons of Diamond Crystal kosher salt, and 0.5 teaspoon of freshly ground black pepper. Pour in the 2 cups of chicken broth and stir gently once to distribute evenly. Bring to a gentle simmer, then reduce heat to low. Cover tightly with a lid and cook undisturbed for 15 minutes.
Develop the Crispy Bottom and Steam
After 15 minutes, carefully remove the lid and increase heat to medium-low. Let the rice cook uncovered for 5-7 minutes until the top layer begins to dry out and develop a golden crust. This is where the crispy bottom forms—don't walk away. You'll see the edges start to crisp and pull away slightly from the pan. If the rice looks dry too quickly, tent loosely with foil and continue cooking.
Once the top layer is crispy, return the lid and cook for another 10-12 minutes on low heat. The rice should be tender and the liquid absorbed. If you poke the center with a fork, it should slide in easily with slight resistance. Remove from heat and let it rest, covered, for 5 minutes. This resting period allows the steam to redistribute and the crispy bottom to set properly.
Finish and Garnish
Discard the bay leaves. Stir in the 1 tablespoon of extra-virgin olive oil to add richness and help separate the grains. If the rice seems dry, add 1-2 tablespoons of water and stir gently. Taste and adjust seasoning—you might need a pinch more salt depending on your broth. For serving, garnish with the 0.25 cup of chopped fresh parsley and 2 sliced green onions. The crispy bottom should crackle when you lift it with a spatula.
Serve immediately with the crispy side up—this is where all the magic happens. Each bite delivers perfectly cooked rice with a satisfying crunch from the bottom layer. The aroma alone will make your kitchen smell like a Southern kitchen. This technique works equally well for rice pilafs, rice bowls, or as a side dish for any main course.
Pro Tips For Making American Rice
- TOAST THE GARLIC RIGHT: After burning three batches, I finally figured out—sauté those minced garlic cloves in butter over medium heat until they’re just golden, not brown. Too much heat turns them bitter, and you’ll taste it in every bite of rice.
- USE A 1:1.75 RATIO: This isn’t just rice and broth—measure 1 cup rice to 1¾ cups broth, or you’ll end up with gluey, sad grains. (Yes, even if the recipe says "about 2 cups.") Trust the math.
- SALT THE BROTH FIRST: Toss in the kosher salt before adding the rice to the pot. The butter’s fat will carry the flavor deeper, and you won’t have to guess if it’s seasoned enough later. I learned this the hard way with bland rice.
- LET IT STEAM COVERED: After the initial simmer, slap that lid on and turn the heat down to low. Walk away for 10 minutes—seriously. The residual heat finishes cooking the rice evenly without drying it out. (Your future self will thank you.)
Creative variations of american rice
Cajun Red Rice
Transform this classic Southern rice into a bold Cajun-inspired dish by adding 1 tablespoon Cajun seasoning (like Tony Chachere's) to the butter during the initial sauté. Stir in ½ cup diced smoked sausage with the garlic and bell pepper for extra depth. Finish with 1 teaspoon smoked paprika and a squeeze of lemon juice before serving. This version pairs perfectly with blackened catfish or shrimp etouffee. 🌶️
Herb-Infused Pilaf
For a fragrant herb pilaf, swap the thyme for 1 teaspoon each of dried rosemary and oregano during the seasoning step. Add ½ cup sliced almonds during the final 5 minutes of cooking for crunch. Garnish with chopped fresh dill and a drizzle of lemon zest. This works beautifully as a base for Mediterranean-style bowls with grilled chicken or falafel.
Spicy Tomato Rice
Brighten the dish by adding 1 cup diced Roma tomatoes with the garlic and bell pepper. Stir in ½ teaspoon red pepper flakes and 1 teaspoon sugar to balance the acidity. Top with crumbled feta cheese and fresh basil before serving. This version shines alongside grilled steak or as a vegetarian main with roasted vegetables.
Cheesy Bacon Rice
Take it to breakfast-level status by cooking 4 slices crispy bacon first, then crumbling it into the pan with the garlic. Stir in 1 cup shredded cheddar cheese during the final 2 minutes of cooking. Top with extra bacon bits and green onions. This hearty version makes an excellent side for fried chicken or eggs.
Citrus-Garlic Rice
Zest up the flavor by adding 1 tablespoon fresh lemon zest with the garlic and 1 teaspoon grated ginger during the sauté. Finish with a splash of lemon juice before serving. Garnish with toasted sesame seeds and sliced scallions. This version pairs wonderfully with grilled salmon or teriyaki chicken.
Breakfast Rice Skillet
Make it a morning star by cooking 2 scrambled eggs in the crispy bottom after removing the rice. Stir the eggs into the rice, then top with crumbled sausage, shredded cheese, and hot sauce**. This one-pan breakfast is ready in 10 minutes and perfect for lazy weekends. 🍳
Nutrition facts
Frequently asked questions
Why does this recipe create a crispy bottom?
The crispy bottom forms from two key techniques: using cold butter cubes that melt slowly, creating a buttery crust, and pressing the rice down gently during the initial cooking. This ensures even contact with the hot pan surface. The uncovered cooking phase later in the process lets the edges dry out and develop that signature crunch.
Can I use brown rice in this recipe?
This method works best with long-grain white rice, which cooks quickly and absorbs flavors perfectly. Brown rice requires more liquid and longer cooking time, making it difficult to achieve the crispy bottom. For a heartier version, try cooking brown rice separately and mixing it with the finished crispy white rice.
What's the best way to reheat leftover rice?
Add 1-2 tablespoons of water or broth to the crispy bottom, cover, and heat on low for 5 minutes. The steam will restore moisture without making the rice mushy. For extra crispiness, place the reheated rice under a broiler for 1-2 minutes before serving. This preserves both the texture and flavor.
How do I adjust this recipe for a larger crowd?
Double the ingredients and use a larger, heavy-bottomed pot. The key is maintaining the same ratio of rice to butter and broth. For 8 servings, use 4 cups rice, 8 tablespoons butter, and 4 cups broth. Increase cooking time by 5-7 minutes total, checking frequently to prevent overcooking.
What if my rice turns out gummy?
Gummy rice usually means too much liquid or insufficient cooking time. Next time, use 1:1.5 ratio of rice to broth (2 cups rice to 3 cups broth) and cook uncovered for 2-3 minutes longer** at the end to evaporate excess moisture. Also ensure you're using long-grain rice that's been rinsed thoroughly.