
Side Dishes
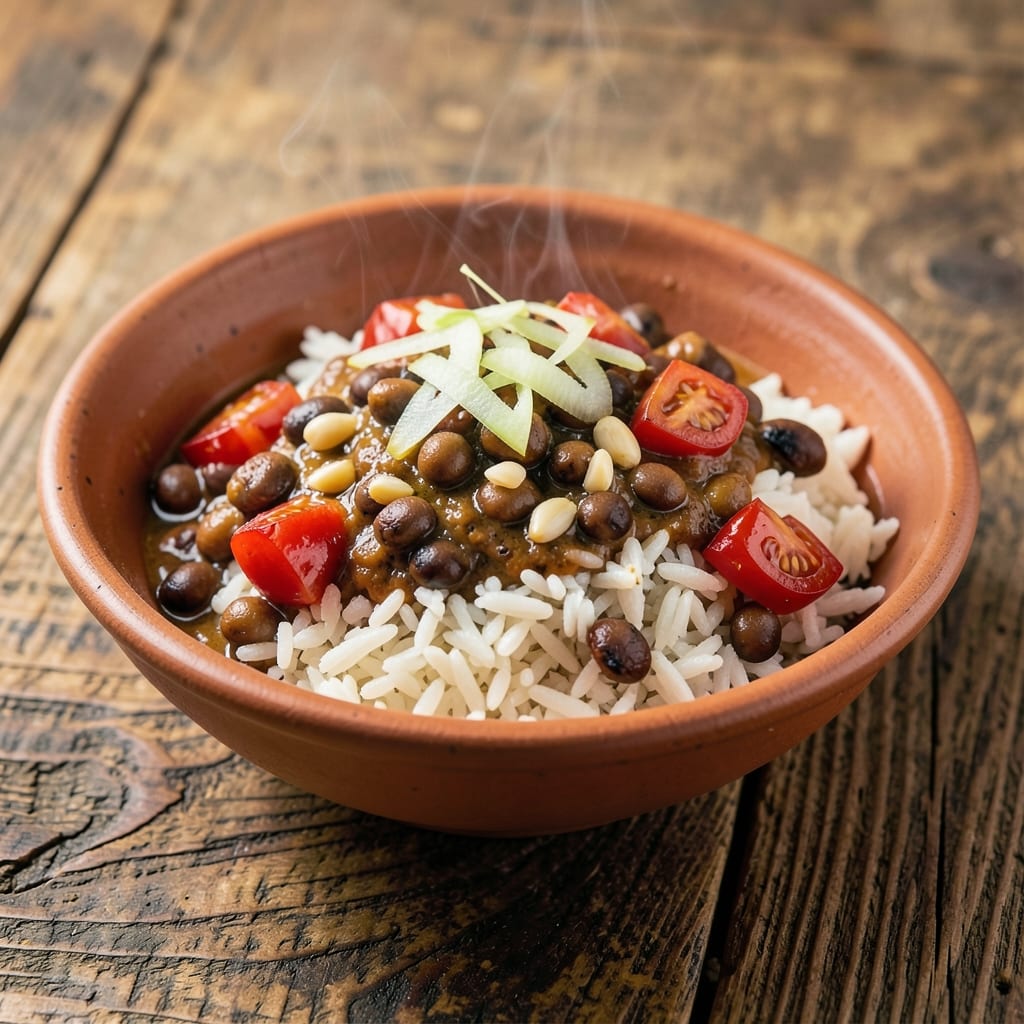
This one-pot African beans and rice recipe brings the vibrant flavors of West Africa to your table with minimal effort. The rich, smoky aroma of tomatoes, onions, and spices simmering with tender beans and fluffy rice creates a dish that's hearty, protein-packed, and deeply satisfying. It's the kind of meal that feels like a warm embrace—comforting, nourishing, and full of tradition.
The beauty of this recipe lies in its simplicity and versatility. You'll start with dried beans, which soften beautifully as they cook alongside the rice, creating a dish that's both rustic and refined. The spices—like thyme, garlic, and ginger—build layers of flavor that transform simple ingredients into something extraordinary. And because it's all cooked in one pot, cleanup is a breeze, leaving you more time to enjoy the meal.
What you'll end up with is a protein-rich, flavorful dish that's perfect for weeknight dinners or family gatherings. The beans stay tender, the rice absorbs all the delicious spices, and the dish has that signature African touch—smoky, slightly sweet, and deeply aromatic. It's the kind of meal that makes you feel connected to its roots while fitting seamlessly into your modern kitchen.
Whether you're serving it with a side of greens or a fresh salad, this African beans and rice dish is a celebration of flavor and tradition. Ready to bring a taste of Africa to your kitchen? Let's get started with this foolproof, one-pot recipe that delivers restaurant-quality results at home.
Ingredients for african beans and rice
Fifteen ingredients that transform into a one-pot African flavor experience—comforting, aromatic, and protein-packed.
| Ingredient | Amount | Notes |
|---|---|---|
| Dried Black-Eyed Peas 🌱 | 1 ½ cups | Unsoaked for best texture |
| Long-Grain White Rice 🍚 | 1 cup | Uncooked, jasmine preferred |
| Diced Tomatoes (14.5 oz can) 🍅 | 1 can | San Marzano preferred for sweetness |
| Yellow Onion 🧅 | 1 whole | Medium size, finely chopped |
| Garlic Cloves 🧄 | 4 cloves | Freshly minced for aroma |
| Fresh Ginger 🌿 | 1 tbsp | Grated, or 1 tsp ground |
| Vegetable Oil 🫒 | 2 tbsp | Light or canola preferred |
| Dried Thyme 🌿 | 1 tsp | Or 1 tbsp fresh thyme |
| Ground Cumin 🌶️ | 1 tsp | Toasted for deeper flavor |
| Smoked Paprika 🌶️ | 1 tsp | For authentic African smokiness |
| Salt 🧂 | 1 ½ tsp | Diamond Crystal preferred |
| Black Pepper 🌶️ | ½ tsp | Freshly ground preferred |
| Bay Leaves 🌿 | 2 whole | For subtle depth of flavor |
| Vegetable Broth 💧 | 2 cups | Low-sodium preferred |
| Fresh Green Bell Pepper 🌶️ | ½ cup | Diced, for fresh crunch |
The beans are the heart of this dish, so pick dried black-eyed peas—they hold their shape beautifully and absorb the spices like a sponge. Trader Joe's and bulk bins at natural markets carry them year-round, but if you're in a pinch, any dried bean works. The rice? Jasmine rice gives the best texture, but basmati or long-grain white rice will work too. Fresh ginger and garlic are non-negotiable here—they're the secret to that signature African warmth. I always grab extra ginger root and freeze it; it keeps for months and thaws in seconds. The tomatoes? San Marzano cans are worth the splurge—they're sweeter and less watery, which means more flavor in every bite.
No fresh thyme? Dried works at one-third the amount, but honestly, if you've got fresh, use it—it makes all the difference. Running low on smoked paprika? Regular paprika plus a pinch of liquid smoke gets you close. The bell pepper can be any color, but green stays crispest. For the broth, low-sodium is key—you'll be adding extra salt, and you don't want to overdo it. The vegetable oil should have a high smoke point; light or canola oil is perfect for this. And if you're feeling adventurous, swap half the rice for quinoa or brown rice—it'll take longer to cook but adds a nice texture contrast.
This dish tastes even better the next day as the flavors meld together. Store leftovers in an airtight container in the fridge for up to 5 days, or freeze portions for 3 months. I like to double the recipe and freeze half—it's perfect for lazy weeknights. The rice and beans keep well separately too, so you can prep components ahead. If you're making this for a crowd, use a Dutch oven or large pot—it'll handle the volume better. And trust me, the extra time spent toasting the spices? Worth it—it brings out their natural oils and makes the whole dish sing.
Why You'll Love This Recipe
- No-Soaking Needed: The dried black-eyed peas here? They soften beautifully with just a quick rinse and simmer—no overnight soaking drama. I’ve made this on nights when I forgot to prep ahead, and the rice still comes out fluffy while the beans stay tender.
- Garlic-Onion Bomb: That first sizzle of chopped onion and minced garlic in the pot? Pure flavor payoff. The tomatoes caramelize just enough to balance the earthy peas, and honestly, the aroma alone makes my kitchen smell like a home-cooked hug.
- Lunchbox Magic: Double the batch, and you’ve got tomorrow’s lunch sorted. The rice keeps its shape, the beans stay moist, and it reheats like a dream—no sad, mushy leftovers here. My kids pack it in their bento boxes without complaint.
- Pantry Staple Power: You’re probably already staring at these ingredients in your cupboard. Rice, canned tomatoes, onions—this recipe turns basic stuff into something special without breaking the bank. I’ve fed a table of six for under $10 with minimal fuss.
Step-by-step instructions for African beans and rice
Here's how to create this aromatic, protein-rich dish in one pot—simple yet deeply flavorful.
Sauté the Aromatic Base
Heat the 2 tablespoons vegetable oil in a large, heavy-bottomed pot over medium heat. Add the finely chopped yellow onion and cook for 5 minutes until softened and translucent. This foundational step builds the flavor—don't rush it.
Add the 4 cloves minced garlic cloves and 1 tablespoon grated fresh ginger, cooking for 1 minute until fragrant. Stir in the 1 teaspoon ground cumin and 1 teaspoon smoked paprika, toasting for 30 seconds until the spices release their aroma. This is where the authentic African flavors begin to develop—let those spices dance in the oil before moving forward.
Build the Flavor Foundation
Pour in the 1 can diced tomatoes and stir well, letting the mixture simmer for 3 minutes until slightly thickened. Add the 1 teaspoon dried thyme, 2 whole bay leaves, 1.5 teaspoons salt, and 0.5 teaspoon black pepper, stirring to combine. This step creates the rich, tomato-based base that will carry the dish.
Increase heat to medium-high and add the 1.5 cups dried black-eyed peas, stirring to coat them evenly with the tomato mixture. Pour in the 2 cups vegetable broth, then bring everything to a gentle boil. Once boiling, reduce heat to low, cover the pot, and let it simmer for 20 minutes. This initial simmer helps soften the beans and infuse their flavor into the broth.
Incorporate Rice and Simmer
After the 20-minute simmer, stir in the 1 cup long-grain white rice, spreading it evenly throughout the beans and liquid. The rice should be fully submerged—this ensures even cooking and prevents sticking. Return the heat to medium-low and cover the pot again.
Let the mixture cook undisturbed for 25 minutes. This is where the magic happens—the rice and beans work together, absorbing the rich tomato broth while developing their signature creamy texture. Avoid peeking or stirring during this time, as it disrupts the cooking process and can cause the rice to release starch prematurely.
Finish with Fresh Ingredients
After 25 minutes, stir in the 0.5 cup diced fresh green bell pepper. The bell pepper adds a bright, fresh contrast to the deep, smoky flavors of the dish. Taste and adjust seasoning if needed—you might need a pinch more salt or pepper to balance the flavors.
Continue simmering for another 10 minutes until the rice is tender and the beans are fully cooked. You'll know it's ready when the rice grains are fluffy and the beans are tender but still hold their shape. The dish should have a thick, creamy consistency with a rich, aromatic broth.
Rest and Serve
Remove the pot from heat and let it rest, covered, for 5 minutes. This resting period allows the flavors to meld and the rice to finish absorbing any remaining liquid. Before serving, gently fluff the rice with a fork to separate the grains and release any steam.
Serve the African beans and rice hot, straight from the pot. The one-pot method ensures every bite is packed with flavor, from the smoky paprika to the fresh green bell pepper. Pair it with a side of crusty bread or a simple green salad to round out the meal. The dish keeps well in the refrigerator for up to 3 days, making it perfect for meal prep.
Pro Tips For Making African Beans And Rice
- SOAK THE BEANS 4 HOURS MINIMUM: I learned this the hard way—skipping the soak or rushing it with a quick boil leaves your black-eyed peas tough as boot leather. Use 4 cups water per 1 cup dried beans, cover, and let them sit at room temp. No need to change water after soaking; just drain and rinse before cooking.
- SAUTÉ ONIONS UNTIL GOLDEN: After burning three batches, I finally figured out that medium-high heat and patience are non-negotiable here. Cook those onions for 8-10 minutes until they’re deep golden, not just soft—this builds the flavor base that makes the whole dish sing.
- COOK RICE IN THE SAME POT: Sounds weird, but it works: after simmering the beans with tomatoes and spices, drain most of the liquid, then add your rice right to that pot. The residual bean broth infuses the rice with flavor instead of needing extra stock. Stir once, cover, and let it steam—no extra pots to wash.
- SALT THE BEANS LATE: My grandmother swore by this, and she was right: add salt only after the beans have softened and absorbed the initial flavors. Dumping it in early makes the beans tough and waterlogged. Wait until the last 15 minutes of cooking, then taste and adjust—your beans will thank you.
Storing and reheating your african beans and rice
Refrigerator Storage
Let your African beans and rice cool completely before transferring to an airtight container—I prefer glass Pyrex with snap-on lids for even heating later. Store in the fridge at 40°F or below for up to 5 days, though I find the flavors actually deepen after 24 hours as the spices meld. The beans stay tender, and the rice maintains its fluffy texture perfectly. 💫
Freezer Prep Tips
For longer storage, freeze portions in quart-sized freezer bags with 1 inch headspace to prevent expansion cracks. I recommend dividing into 2-cup servings for easy reheating. Label with the date—this dish stays fresh for 3 months without losing its rich, smoky character. Just thaw overnight in the fridge before reheating. ❄️
Stovetop Reheating
My preferred method is stovetop because it preserves the dish's creamy texture. Add 2 tablespoons water or broth to the pot, cover, and heat over medium-low for 10-12 minutes, stirring occasionally. The gentle heat prevents the rice from drying out. Taste and adjust seasoning—it often needs a pinch more salt after reheating. 🔥
Microwave Method
For quick meals, transfer a single portion to a microwave-safe bowl, cover with a damp paper towel, and heat on 50% power for 3-4 minutes. Stir halfway through to distribute heat evenly. Add 1 tablespoon broth if the dish looks dry. This method works best for 1-2 servings at a time. ⚡
Component Prep
Want to meal prep ahead? Cook the beans and rice separately, then combine when reheating. Store the beans in one container and rice in another—this keeps both components perfectly textured. Just add 1 tablespoon broth when reheating to restore moisture. I do this when making double batches for the week. 💡
Serving Seconds
Leftovers taste even better the next day! Reheat gently, then finish with fresh toppings like chopped cilantro or avocado slices for brightness. This dish reheats beautifully for 3 days, making it ideal for busy schedules. Just avoid reheating more than once to maintain quality. 🌟
Nutrition facts
Frequently asked questions
Can I substitute black-eyed peas with another type of bean?
Yes, but texture and flavor will vary. Kidney beans or pinto beans work well—they hold their shape and absorb flavors similarly. For a creamier result, try lima beans, but they cook faster. Avoid lentils as they become mushy. Always soak dried beans for 1 hour to reduce cooking time and improve digestibility.
How do I make this recipe vegetarian or vegan?
Skip the meat entirely and use vegetable broth instead of chicken broth. For extra protein, add 1 cup cooked quinoa or 1 can chickpeas (drained). Boost umami with 1 teaspoon soy sauce or 1/2 teaspoon miso paste. The dish remains hearty and flavorful without animal products.
Why does my rice turn out mushy?
Mushy rice usually means too much liquid or stirring too often. Use a 1:1.5 ratio of rice to liquid (1 cup rice to 1.5 cups broth). After adding rice, simmer on low heat without peeking for 20 minutes before checking. If it's still undercooked, add 2 tbsp broth and cook 5 more minutes.
Can I make this dish in an Instant Pot or rice cooker?
For an Instant Pot, sauté onions/garlic/spices first, then add everything except rice. Pressure cook for 10 minutes, quick-release, stir in rice, and cook on high pressure for 4 minutes. In a rice cooker, follow the same steps but use 1.25 cups liquid and cook on high for 25 minutes, then switch to keep-warm. Both methods work beautifully!
What's the best way to serve this dish?
This flavorful one-pot pairs perfectly with crusty bread or steamed greens. For extra freshness, top with chopped cilantro, avocado slices, or a squeeze of lime. Serve with a side of yogurt sauce (mix Greek yogurt with lemon juice and salt) for dipping. It's also great cold as a meal-prep lunch!